Hey food lovers! Are you ready to ditch the takeout menus and unlock the secret to the most incredible, shatteringly crisp, and unbelievably juicy fried chicken you’ve ever tasted? Trust me, this isn’t your grandma’s recipe—though she’d approve! We’re diving deep into the brine, the dredge, and the perfect frying temperature to bring you a restaurant-quality classic right in your own kitchen. Get ready for applause!
Quick Facts
Prep time: 30 minutes (plus soaking time)
Cooking time: 20-25 minutes
Total time: About 1 hour 45 minutes (including marinating)
Serving size: 4-6 happy people
Why You’ll Love This Recipe
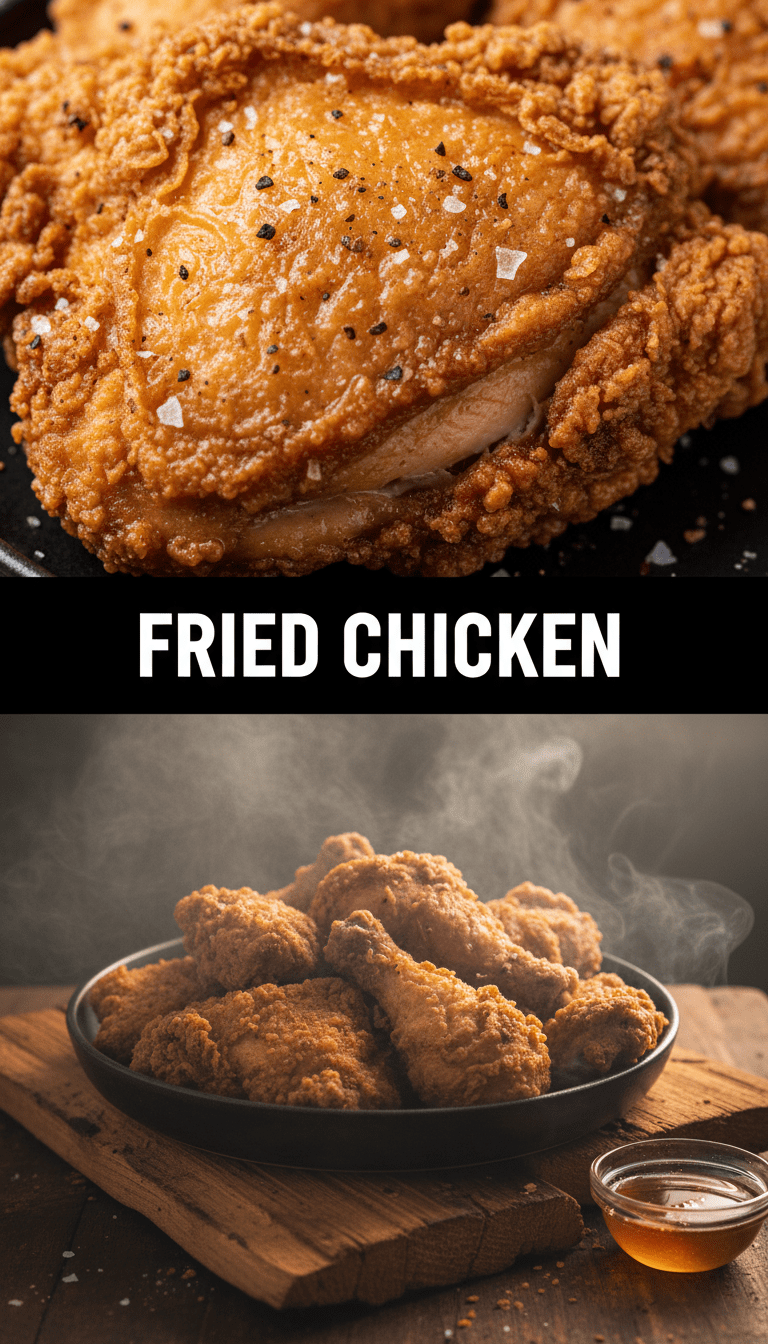
This isn’t just fried chicken; it’s an experience. We use a buttermilk soak which does two magical things: it tenderizes the meat beautifully and gives the coating something amazing to cling to. The double-dredge technique ensures that ultimate craggy, crispy texture everyone craves. Plus, once you master this, you’ll never look back!
Ingredients You’ll Need
For the Chicken and Brine:
- 3 lbs mixed bone-in, skin-on chicken pieces (drumsticks, thighs, wings are great)
- 4 cups buttermilk (full fat works best)
- 2 tablespoons hot sauce (like Frank’s or Tabasco)
- 1 tablespoon salt
- 1 teaspoon black pepper
For the Crispy Coating:
- 3 cups all-purpose flour
- 1/2 cup cornstarch (this is key for extra crispiness!)
- 2 tablespoons smoked paprika
- 1 tablespoon garlic powder
- 1 tablespoon onion powder
- 1 tablespoon dried oregano
- 1 teaspoon cayenne pepper (adjust to your heat preference)
- 1 teaspoon salt
- 1 teaspoon black pepper
For Frying:
- 6-8 cups neutral oil for frying (vegetable, canola, or peanut oil recommended)
Step-by-Step Frying Magic
Follow these steps closely, and I promise you glorious results!
Step 1: The Buttermilk Bath (The Tenderizer)
In a large bowl or a sealed Ziploc bag, whisk together the buttermilk, hot sauce, 1 tablespoon of salt, and 1 teaspoon of pepper. Add the chicken pieces, ensuring they are fully submerged. Cover and refrigerate for at least 4 hours, but preferably overnight. This step hydrates the meat and makes it so tender!
Step 2: Prep the Dredge
About 30 minutes before you plan to fry, prepare your coating mixture. In a large, shallow dish, whisk together the flour, cornstarch, paprika, garlic powder, onion powder, oregano, cayenne, remaining salt, and pepper. Mix thoroughly so the seasonings are evenly distributed.
Step 3: The Double Dip (Building the Crunch)
Take the chicken pieces out of the buttermilk mixture, letting the excess drip off—but do not rinse them!
1. First Coat: Drop the wet chicken piece directly into the flour mixture. Press the flour onto the chicken firmly, ensuring every nook and cranny is covered.
2. The Wet Step: Quickly dip the floured chicken back into the leftover buttermilk for just a second or two. This is crucial for the craggy texture!
3. Second Coat: Immediately place the damp chicken back into the flour mixture. Press and gently squeeze the coating onto the chicken. You want visible flakes and texture forming. Set the coated chicken pieces on a wire rack while you finish the rest.
Step 4: Heating the Oil (Temperature is Everything)
Pour your oil into a large, heavy-bottomed Dutch oven or deep skillet until it reaches about 2 inches deep. Heat the oil over medium-high heat until it reaches 325°F (160°C). Use a thermometer—this temperature control is the secret to juicy interiors and non-burnt crusts!
Step 5: Fry to Golden Glory
Carefully lower 3-4 pieces of chicken into the hot oil. Do not overcrowd the pot, as this will drop the oil temperature too much and result in greasy chicken.
- Fry the chicken for about 6-8 minutes per side for pieces like thighs and drumsticks, until deeply golden brown. Smaller pieces (like wings) will cook faster.
- Maintain the oil temperature between 300°F and 325°F throughout the process.
- Once cooked through (internal temperature should read 165°F), remove the chicken with tongs and place it back on a clean wire rack set over a baking sheet. Sprinkle immediately with a tiny pinch of sea salt.
- Let the chicken rest for 5 minutes before serving.
Serving Suggestions
This crispy chicken is fantastic served simply with classic sides. Try it alongside creamy mashed potatoes and gravy, tangy coleslaw, or some good old-fashioned baked beans. A side of homemade biscuits and honey is never a bad idea either!
Tips for Customization & Variations
- Herbaceous Kick: Add 1 tablespoon of finely chopped fresh rosemary or thyme into your flour mixture for an earthy flavor profile.
- Spicy Lovers: Increase the cayenne pepper to 2 teaspoons or swap half the flour for self-rising flour for a slightly lighter batter, and use a dash of cayenne in the buttermilk too!
- Baking/Air Frying: While the best crunch comes from deep frying, you can bake this! Spray the coated chicken with cooking spray and bake at 400°F (200°C) for 35-45 minutes, flipping halfway, until golden brown. It won’t be quite as crisp, but it’s tasty!
Estimated Nutritional Information (Per Serving, based on 6 servings, estimate only)
Please remember these are rough estimates and will vary widely based on cut of meat and oil absorption:
Calories: 550-650
Protein: 35g
Fat: 35g
Carbohydrates: 30g
Frequently Asked Questions (FAQs)
Q: Can I use chicken breast?
A: Yes, you can! Chicken breast cooks much faster, usually taking only 5-7 minutes per side at 325°F. Watch them closely to prevent drying out.
Q: Why is my coating falling off?
A: This is almost always due to oil temperature being too high or not pressing the flour hard enough during the double dredge. If the oil is too hot, the crust sets instantly before it can adhere properly. Ensure your oil is steady at 325°F!
Q: Can I fry the chicken ahead of time?
A: Absolutely! Fried chicken is excellent reheated. Let it cool completely, then reheat in an oven preheated to 375°F (190°C) for about 10-15 minutes until the crust is crisp again. Avoid microwaving if possible, as it softens the crust.
Enjoy every single crispy, juicy bite! Happy cooking!