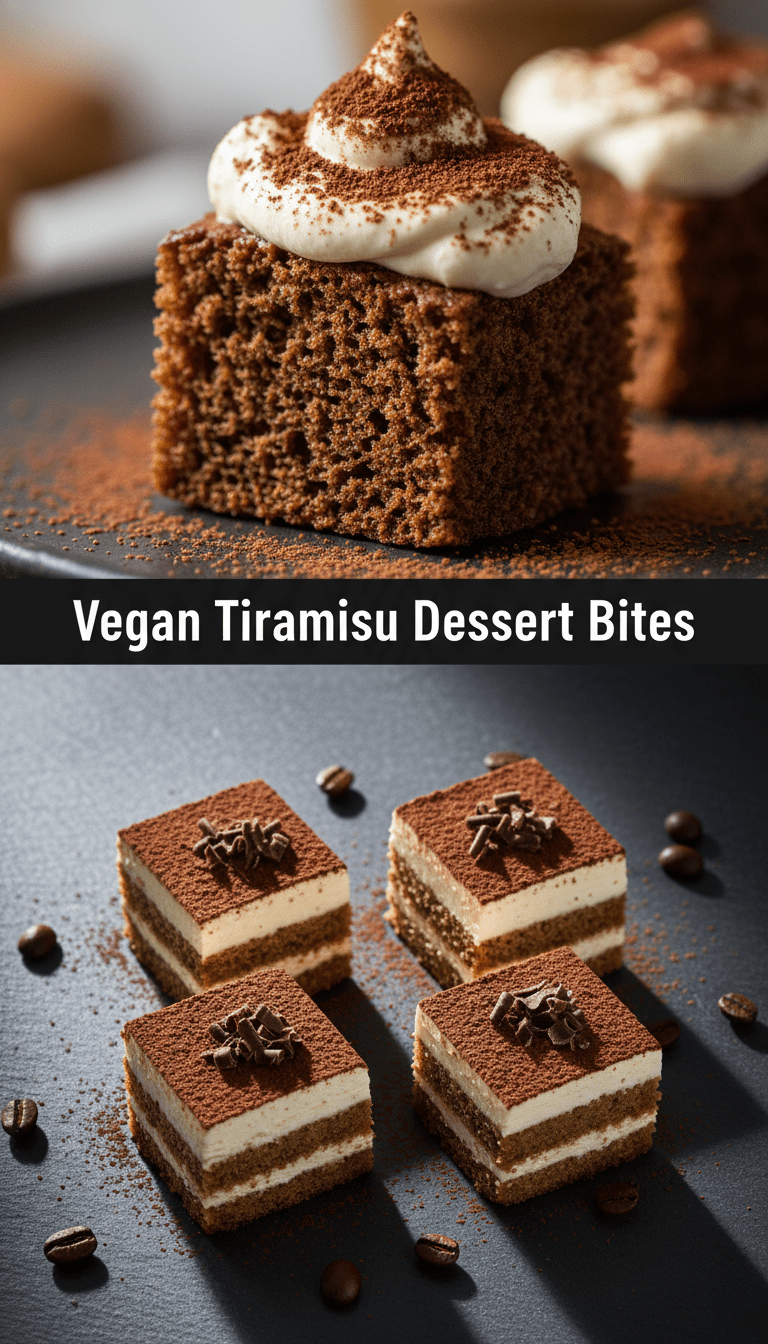
Hey there, dessert lovers! Are you ready to meet your new favorite sweet treat? Tiramisu is a classic for a reason—that creamy, coffee-soaked goodness is pure heaven. But what if I told you we could have all that decadent flavor, make it completely vegan, and shrink it down into perfect, easy-to-eat little bites?
Today, we’re diving into my recipe for Vegan Tiramisu Dessert Bites. These are no-bake, unbelievably rich, and honestly, they disappear faster than you can say “espresso!” Perfect for parties, afternoon snacking, or when you just need a little moment of joy. Let’s get mixing!
Quick Facts
Prep time: 25 minutes
Chill time: Minimum 4 hours (or overnight for best results)
Total time: Approximately 4 hours 25 minutes
Serving size: Makes about 16-18 bites
Why You’ll Love This Recipe
This recipe is a game-changer!
- Easy & No-Bake: Seriously, no oven required. Just mixing, layering, and chilling.
- Intense Flavor: We nail that authentic coffee and cocoa punch without any dairy or eggs.
- Perfect Portions: Individual bites mean no messy slicing, making them fantastic for entertaining.
- Totally Vegan: Crafted using simple swaps like cashew cream and plant milk.
Ingredients You’ll Need
We’ll be making two main components: the creamy filling and the coffee-soaked base.
For the Creamy Mascarpone-Style Filling:
- 1 cup raw cashews (soaked in hot water for at least 30 minutes, then drained)
- 1/2 cup full-fat coconut cream (the thick, solid part from a chilled can of coconut milk)
- 1/4 cup maple syrup (or agave)
- 1 teaspoon pure vanilla extract
- 1 tablespoon fresh lemon juice (this adds that crucial tangy “cheese” flavor!)
- Pinch of fine sea salt
For the Coffee Base & Assembly:
- 1 cup strong brewed coffee or espresso (cooled completely)
- 1 tablespoon dark rum or Kahlúa (optional, but highly recommended for depth!)
- 1 package (about 7 oz) vegan ladyfinger cookies or firm vegan shortbread cookies
- Unsweetened cocoa powder, for dusting
Step-by-Step Instructions
Follow these steps, and you’ll be enjoying tiramisu bites in no time!
Step 1: Prepare the Cream Base
1. If you haven’t already, soak your cashews in very hot water for at least 30 minutes. Drain them well.
2. Combine the soaked cashews, coconut cream, maple syrup, vanilla, lemon juice, and salt into a high-speed blender or a powerful food processor.
3. Blend until the mixture is absolutely silky smooth. This is important—you don’t want any graininess! Stop and scrape down the sides as needed. It should be thick, like a soft frosting. Set aside.
Step 2: Prepare the Coffee Soak
1. In a shallow bowl, combine the cooled brewed coffee and the optional rum/liqueur. Stir well.
Step 3: Assemble the Bites
1. Line a baking sheet or a small tray with parchment paper. This will prevent sticking.
2. Take one vegan cookie and quickly dip one side into the coffee mixture—just a quick dunk, about 1-2 seconds per side. You want it moist, not soggy!
3. Place the dipped cookie on your prepared tray.
4. Generously spoon or pipe a dollop of the creamy filling onto the top of the cookie base. Aim for about 1 heaping tablespoon per bite.
5. Take a second dipped cookie and gently press it on top of the cream layer to create a small sandwich. Smooth the edges slightly if needed.
6. Repeat until all your cookies and cream are used up.
Step 4: Chill and Finish
1. Place the tray of assembled bites carefully into the freezer for about 30 minutes to help them firm up slightly.
2. Transfer the bites to an airtight container and refrigerate for at least 4 hours, or ideally, overnight. This allows the flavors to meld and the filling to set perfectly.
3. Just before serving, use a fine-mesh sieve to generously dust the tops of the Vegan Tiramisu Dessert Bites with unsweetened cocoa powder.
Serving Suggestions
These bites are lovely served straight from the fridge. For an extra elegant touch, serve them on a white platter alongside a tiny shot glass of chilled coffee or a small glass of almond milk. They also look fantastic nestled into small paper cupcake liners.
Tips for Customization & Variations
- Gluten-Free Option: Swap the standard cookies for a firm GF shortbread or even a thick graham cracker alternative (ensure the binder is vegan).
- Mocha Magic: Add 1 teaspoon of instant espresso powder directly into the creamy filling mixture before blending for an extra chocolatey kick.
- Different Fruit Twist: For a non-traditional flavor, dip the cookies briefly in chilled black tea instead of coffee and add a tiny splash of almond extract to the cream.
Nutritional Information (Estimated Per Bite)
Please note: This is a rough estimate and highly dependent on the specific brands of cookies and coconut milk used.
Calories: 180-220 kcal
Fat: 12-15g
Carbohydrates: 18-22g
Protein: 3-4g
Frequently Asked Questions (FAQs)
Q1: Can I make this ahead of time?
Yes! In fact, I highly recommend making them the day before. The chilling process allows the coffee flavor to fully penetrate the cookies and the cream to set beautifully. Store leftovers in an airtight container in the fridge for up to 3 days.
Q2: Why are my cashews not blending smoothly?
The most common issue is insufficient soaking or a weak blender. Make sure your cashews have been soaking for at least 30 minutes in hot water (or overnight in cold water). If your blender struggles, add an extra tablespoon of coconut cream and be patient, blending in short bursts until perfectly smooth.
Q3: Can I skip the lemon juice?
You can, but I wouldn’t advise it! The subtle acidity from the lemon juice is what mimics the tanginess of traditional mascarpone cheese. Without it, the cream can taste a little flat.
Q4: How do I store these if I want them firm, like ice cream?
If you prefer a firmer texture, you can freeze the finished bites for up to a month. Thaw them on the counter for about 10-15 minutes before eating to return them to the perfect, fudgy-yet-creamy consistency.
Happy baking—or rather, happy no-baking! Enjoy these dreamy little bites!