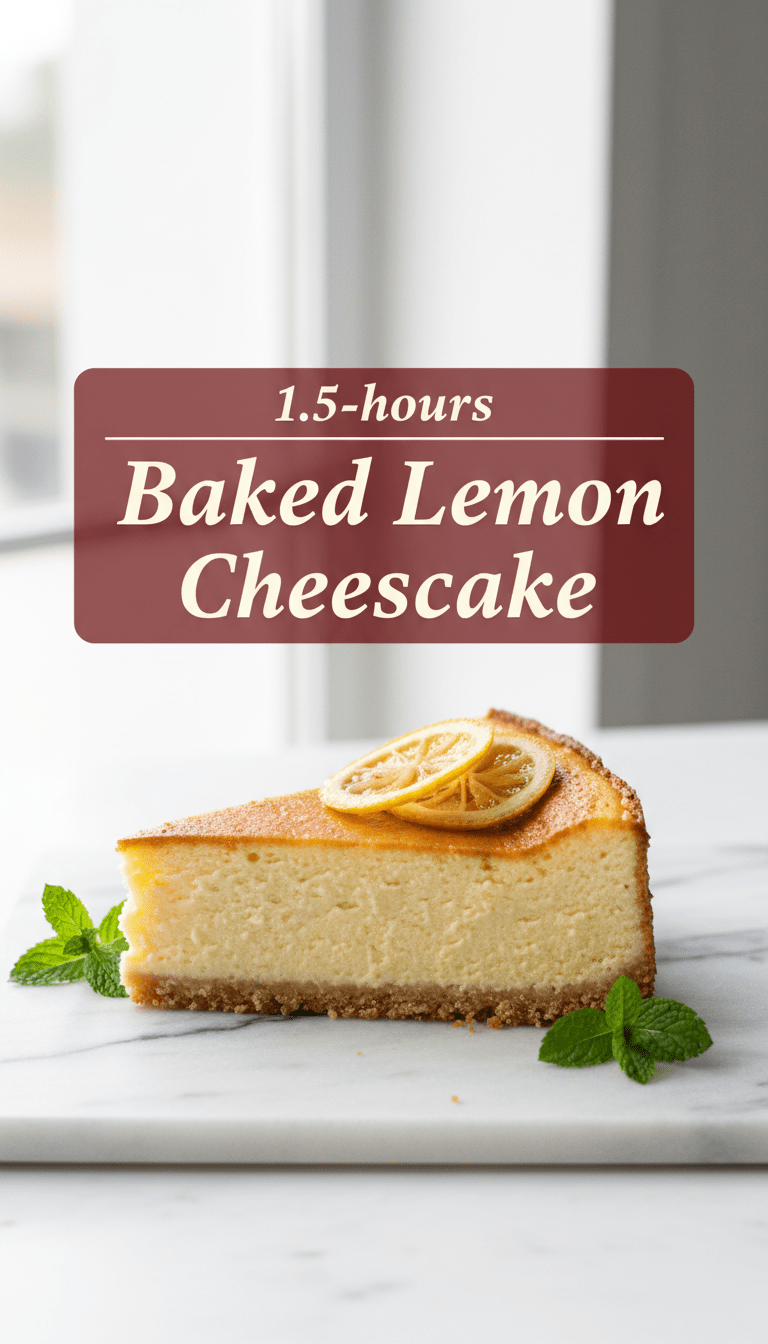
Hey there, fellow food lovers! If there’s one dessert that screams “elegance” but is secretly a total breeze to make, it’s a Baked Lemon Cheesecake. Forget those wobbly, supermarket versions. Today, we are diving deep into a recipe that delivers a creamy, dense texture kissed with the brightest, happiest lemon flavor imaginable. Trust me, this isn’t just a cheesecake; it’s a sunshine hug in slice form!
Ready to transform your kitchen into a little slice of lemon heaven? Let’s get baking!
Quick Facts
Prep time: 25 minutes
Cooking time: 60-70 minutes
Chilling time: Minimum 6 hours (overnight is best!)
Total time: About 7 hours 25 minutes (mostly waiting!)
Serving size: 10-12 generous slices
Why You’ll Love This Recipe
This isn’t just any baked cheesecake; it’s the baked cheesecake. Here’s why this recipe will become your new go-to:
- Incredibly Creamy Texture: We use a water bath (don’t worry, it’s easy!) to ensure a smooth, crack-free, velvety finish.
- Perfectly Balanced Flavor: It has that delightful tang from fresh lemon zest and juice that cuts through the richness of the cream cheese beautifully.
- Simple Ingredients: Everything you need is likely already in your pantry or fridge.
Gather Your Sunshine: The Ingredients List
We need ingredients for three components: the crust, the filling, and a little extra zing!
For the Graham Cracker Crust:
- 1 ½ cups Graham cracker crumbs (about 12 full sheets)
- ¼ cup granulated sugar
- 6 tablespoons unsalted butter, melted
For the Lemon Cheesecake Filling:
- 3 (8-ounce) packages full-fat cream cheese, softened to room temperature (this is key!)
- 1 ½ cups granulated sugar
- ¼ cup all-purpose flour
- 1 teaspoon vanilla extract
- Zest of 2 large lemons
- ¼ cup fresh lemon juice (about 1 ½ lemons)
- 4 large eggs, room temperature
Baking Bliss: Step-by-Step Instructions
Follow these steps closely, and you’ll have a masterpiece!
Step 1: Prep Work & Preheating
1. Preheat your oven to 325°F (160°C).
2. Grease a 9-inch springform pan. To prepare for the water bath, wrap the outside bottom of the springform pan tightly with two layers of heavy-duty aluminum foil. This stops water from seeping in.
Step 2: Building the Perfect Crust
1. In a medium bowl, combine the graham cracker crumbs and ¼ cup sugar.
2. Pour in the melted butter and mix until the crumbs are evenly moistened, resembling wet sand.
3. Press this mixture firmly and evenly into the bottom of your prepared springform pan. You can use the bottom of a measuring cup to get a nice, compact base.
4. Bake the crust for 8 minutes. Let it cool slightly while you make the filling.
Step 3: Mixing the Velvety Filling
1. In a large bowl (or stand mixer fitted with the paddle attachment), beat the softened cream cheese on medium speed until it is completely smooth and fluffy—no lumps allowed! Scrape down the sides frequently.
2. Gradually add the 1 ½ cups of sugar and the flour, beating until just combined.
3. Mix in the vanilla extract, lemon zest, and lemon juice until fragrant.
4. Crucial Step: Add the eggs one at a time, beating just until each egg is incorporated. Do not overmix once the eggs are in, as this incorporates too much air and leads to cracking!
Step 4: The Water Bath Magic
1. Pour the creamy filling over the partially baked crust. Smooth the top with a spatula.
2. Place the foil-wrapped springform pan inside a larger roasting pan.
3. Carefully pour very hot water into the roasting pan until the water comes about halfway up the sides of the springform pan. This is your bain-marie or water bath—it insulates the cake and keeps the temperature even.
Step 5: Baking Low and Slow
1. Bake for 60 to 70 minutes. The edges should look set, but the center 2-3 inches should still have a slight jiggle (like firm Jell-O).
2. Turn off the oven, crack the oven door open a few inches (you can prop it with a wooden spoon), and let the cheesecake cool inside the oven for 1 hour. This slow cooling prevents drastic temperature changes that cause cracks.
3. Remove the cheesecake from the water bath and foil. Let it cool completely on a wire rack at room temperature (about 1-2 hours).
4. Once cool, cover loosely with plastic wrap and refrigerate for at least 6 hours, but preferably overnight, before slicing.
Serving Suggestions
This cheesecake is brilliant on its own, but if you want to dress it up:
- A simple dusting of powdered sugar.
- A dollop of fresh, lightly sweetened whipped cream.
- Fresh raspberries or blueberries scattered on top for color contrast.
- A light drizzle of homemade lemon curd.
Tips for Customization & Variations
Want to switch things up? Try these easy adjustments:
- Lime Lover? Swap the lemon zest and juice entirely for fresh lime zest and juice for a gorgeous Baked Key Lime Cheesecake!
- Biscuit Base: If you don’t have graham crackers, use digestive biscuits or shortbread cookies for the crust.
- Extra Zest Factor: For an intensely flavored crust, mix about ½ teaspoon of lemon zest into the melted butter before adding it to the crumbs.
Estimated Nutritional Information (Per Slice, Based on 12 slices)
Please note: This is an estimation and will vary based on exact ingredient brands.
Calories: 450-500
Fat: 30g
Carbohydrates: 40g
Protein: 7g
Frequently Asked Questions (FAQs)
Q: Why is my cheesecake cracking?
A: Cracking is usually due to two things: overmixing the batter (incorporating too much air) or cooling it too quickly. Always mix eggs in gently, and always follow the slow cooling process inside the turned-off oven!
Q: Can I skip the water bath?
A: You can, but I strongly advise against it for a creamy, perfect result. The water bath provides moist, gentle heat that prevents the edges from over-baking while the center sets, leading to that signature silkiness.
Q: Can I make this ahead of time?
A: Absolutely! Cheesecakes are best when made a day ahead. The flavor actually deepens overnight in the fridge. Just keep it tightly covered.
Happy baking, friends! I hope this bright, beautiful Baked Lemon Cheesecake brings a little extra sunshine to your table! Let me know in the comments how yours turns out!
