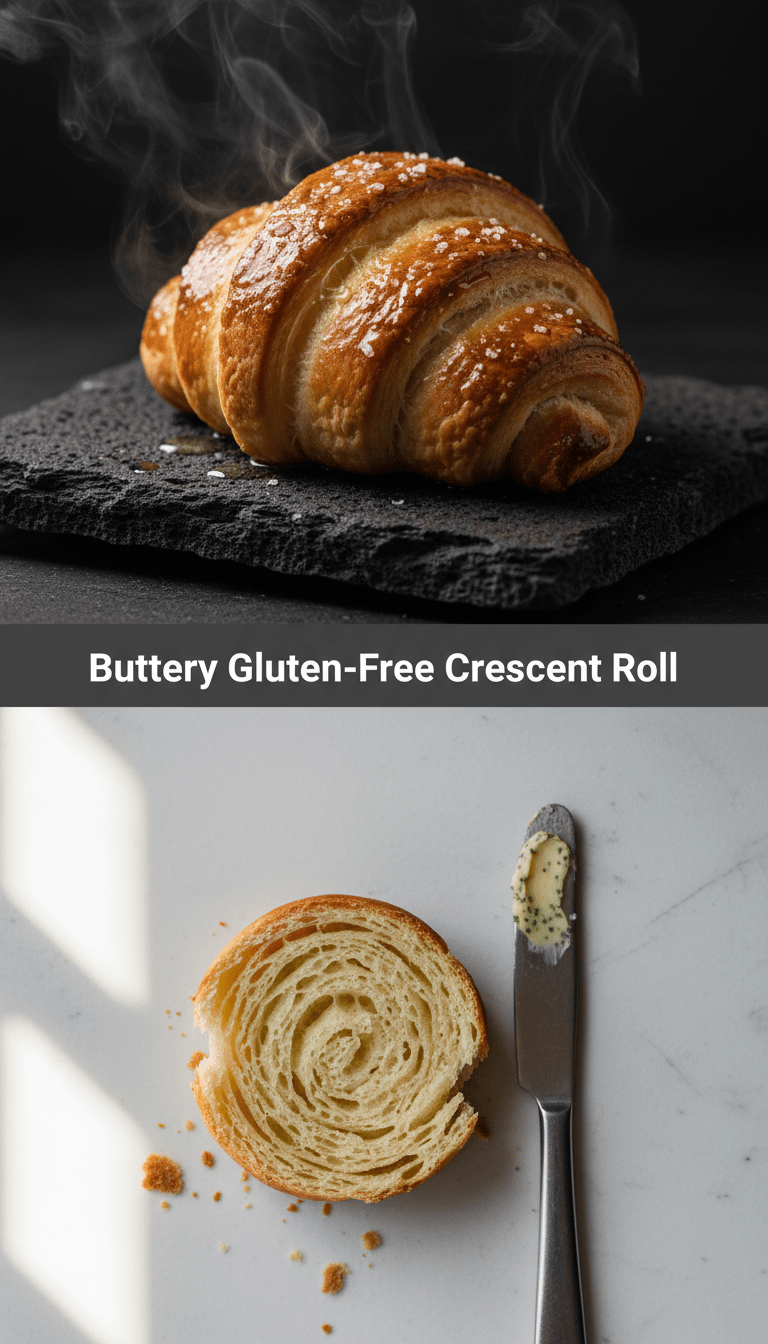
Hello, fellow food lovers! Have you ever craved that melt-in-your-mouth, buttery goodness of a classic crescent roll, only to be stopped in your tracks by gluten? Well, I’ve been there, and after many, many kitchen experiments, I’m thrilled to share what I think is the absolute best recipe for Buttery Gluten-Free Crescent Rolls.
These aren’t those dense, crumbly gluten-free approximations. Oh no! These are light, airy, wonderfully flaky, and so buttery you’ll swear you’re cheating! They are perfect for holidays, weekend brunches, or just whenever you need a warm hug in bread form. Let’s get baking!
Quick Facts
Prep time: 25 minutes (plus 30 minutes resting time)
Cooking time: 14-16 minutes
Total time: About 1 hour 10 minutes
Serving size: 8 large rolls
Why You’ll Love This Recipe
There are a few reasons why this recipe has become a staple in my house:
- Incredible Texture: Thanks to a specific blend of gluten-free flours and the magic of yeast, these actually rise high and stay soft.
- Real Butter Flavor: We use a generous amount of cold butter, folded in just right, to achieve those signature layers.
- Surprisingly Easy: While gluten-free baking can seem intimidating, these steps are straightforward—no fancy equipment required!
- Perfectly Versatile: Use them for dinner rolls, small breakfast sandwiches, or wrapped around cocktail wieners!
Gathering Your Ingredients
The secret to great gluten-free baking often lies in the flour blend. I highly recommend a good quality 1-to-1 gluten-free baking blend that already contains xanthan gum.
For the Crescent Rolls:
- 1 cup warm milk (around 105°F – 115°F)
- 2 ¼ teaspoons active dry yeast (one standard packet)
- 2 tablespoons granulated sugar, plus a pinch for the yeast
- 3 cups high-quality Gluten-Free All-Purpose Baking Blend (with xanthan gum)
- 1 teaspoon salt
- 1 large egg, room temperature
- 4 tablespoons unsalted butter, melted and slightly cooled
- ½ cup cold unsalted butter, cut into small cubes (this is key for flakiness!)
For the Buttery Topping:
- 4 tablespoons unsalted butter, melted
- 1 teaspoon flaky sea salt (optional, but wonderful)
Step-by-Step Baking Magic
Follow these steps closely, especially regarding dough handling, and you’ll have beautiful crescents!
Step 1: Activate the Yeast (The Bloom)
In a large bowl or the bowl of a stand mixer, combine the warm milk, the yeast, and the pinch of sugar. Let this mixture sit undisturbed for 5 to 10 minutes until it becomes foamy and smells distinctly yeasty. This means your yeast is alive and ready to work!
Step 2: Mixing the Dough
Once the yeast is active, add the 2 tablespoons of sugar, the GF flour blend, salt, the room-temperature egg, and the 4 tablespoons of melted butter to the yeast mixture. Mix on low speed with a paddle attachment (or by hand with a sturdy spoon) until a soft, slightly sticky dough forms. Unlike wheat dough, this will not form a tight ball—it will be more like a thick batter or a very soft cookie dough.
Step 3: Folding in the Cold Butter Layers
This is where we mimic lamination! Gently fold in the small cubes of cold butter using a spatula. Do not overmix; you want distinct chunks of cold butter scattered throughout the dough.
Step 4: The Rest Period
Cover the bowl tightly with plastic wrap. Let the dough rest in a warm spot for about 30 minutes. Gluten-free dough doesn’t rise as dramatically as wheat dough, but this rest allows the yeast to start working and the starches in the flour to fully hydrate.
Step 5: Shaping the Crescents
Lightly dust a large sheet of parchment paper with GF flour. Scrape the sticky dough onto the parchment. Dust the top lightly as well. Gently roll the dough out into a large, rough rectangle, about ¼ inch thick. Don’t worry about perfection!
Using a pizza cutter or a sharp knife, trim the edges slightly. Cut the rectangle into 8 equal, long triangles (like slicing a pizza into 8 slices).
Step 6: Rolling Them Up
Starting from the wide end of each triangle, gently roll the dough tightly towards the tip. Curve the roll slightly to form a crescent shape. Place them seam-side down on a baking sheet lined with fresh parchment paper, leaving about 2 inches between each roll.
Step 7: The Final Proof
Cover the shaped crescents loosely with plastic wrap or a clean kitchen towel. Let them sit in a warm place for another 20-30 minutes. They will puff up slightly. Preheat your oven to 375°F (190°C) during the last 10 minutes of this rest.
Step 8: Bake and Glaze!
Bake for 14 to 16 minutes, or until they are beautifully golden brown.
Immediately upon removing them from the oven, brush the tops generously with the 4 tablespoons of melted butter. Sprinkle with flaky sea salt, if desired. Let them cool slightly on the pan before transferring to a wire rack.
Serving Suggestions
These rolls are divine on their own, but here are a few ways I love to serve them:
- Brunch Power: Serve alongside scrambled eggs and fresh fruit salad.
- Soup Companion: Perfect for dipping into a hearty bowl of tomato soup or chili.
- Sweet Treat: Brush with honey butter or dust with powdered sugar for a dessert vibe.
Tips for Customization & Variations
Want to jazz things up? Try these simple additions:
1. Cheesy Swirls: Before rolling up the triangles, sprinkle a teaspoon of grated sharp cheddar or Parmesan cheese down the length of the dough.
2. Herb & Garlic: Mix 1 teaspoon of dried parsley, ½ teaspoon of garlic powder, and a pinch of dried dill into the melted butter used for the topping.
3. Sweet Filling: Before rolling, spread a thin layer of cinnamon-sugar mixture or warmed apricot jam on the triangle for a sweeter roll.
Nutritional Information (Estimated Per Roll)
Please note: These are rough estimates and will vary based on the specific GF blend used.
Calories: Approximately 250-280
Fat: 16g
Carbohydrates: 25g
Protein: 4g
Frequently Asked Questions (FAQs)
Q1: Can I use dairy-free butter or milk?
A: Yes! This recipe works wonderfully with vegan butter substitutes. Ensure your plant-based milk is slightly warm (not hot) for the yeast activation.
Q2: My dough seems too sticky to handle. What should I do?
A: Gluten-free dough is inherently sticky! Don’t be tempted to add too much extra flour, as this leads to dry rolls. Instead, use plenty of parchment paper and lightly flour your hands when shaping.
Q3: How far in advance can I prepare these?
A: You can prepare and shape the rolls (Step 6), place them on the baking sheet, cover them, and refrigerate them for up to 12 hours. Before baking, let them sit at room temperature for 1 hour, then bake as directed. They might need 1-2 extra minutes in the oven if coming straight from the fridge.
Q4: Why are my rolls dense instead of flaky?
A: Density usually means one of two things: either the yeast wasn’t active, or you overmixed the dough after adding the cold butter cubes. Keep those butter cubes cold and try not to work the dough more than necessary!
Happy baking, everyone! I can’t wait to hear how these incredible, buttery, gluten-free delights turn out for you!