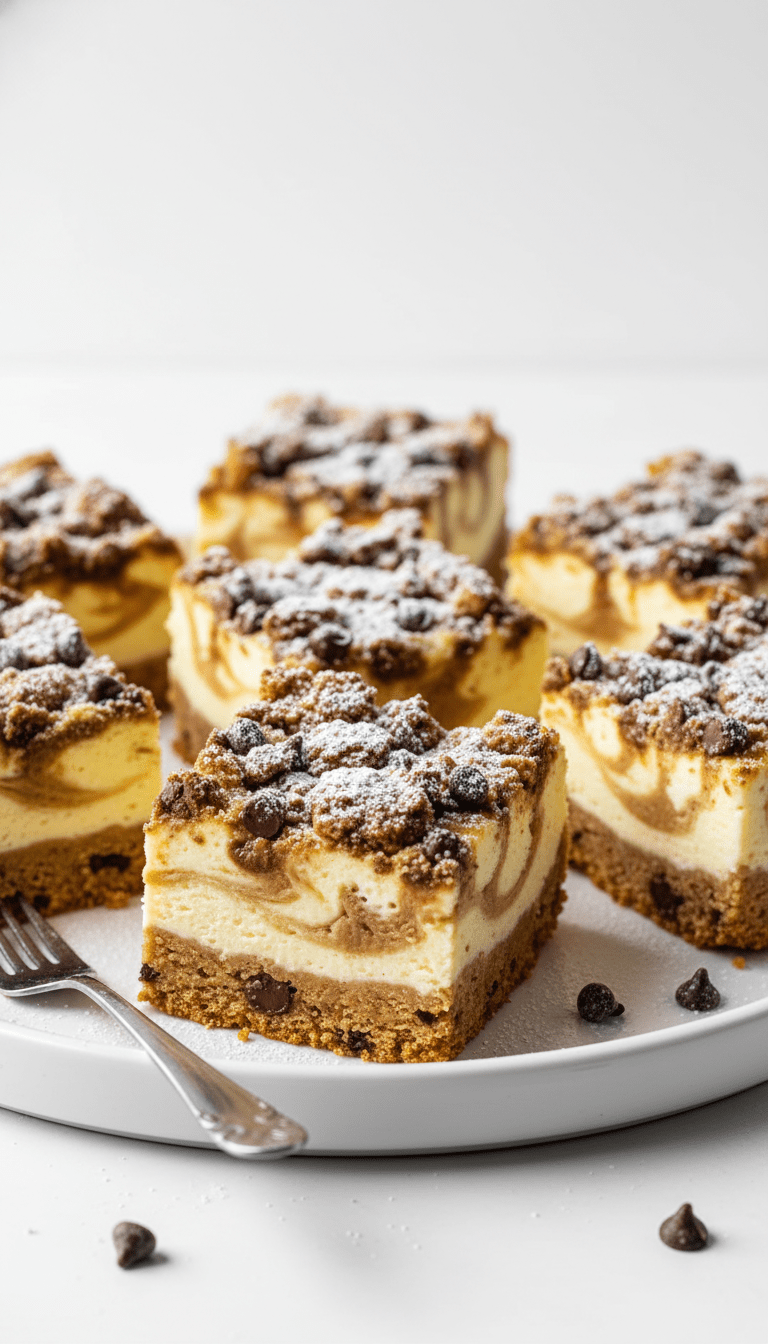
Hello, baking buddies! Are you ready for a dessert that throws the best dinner party ever between two of the most beloved treats known to humankind? I’m talking about combining creamy, tangy cheesecake with gooey, irresistible chocolate chip cookie dough. Yes, you heard that right! Today, we are diving headfirst into making Cookie Dough Cheesecake Bars. These aren’t just bars; they are little squares of heaven. They’re sturdy enough for potlucks but decadent enough for a special celebration. Trust me, once you try this recipe, it’s going straight into your permanent rotation. Let’s get baking!
Quick Facts
Here’s the rundown so you can plan your baking adventure:
Prep time: 30 minutes
Chilling time: At least 4 hours (or overnight)
Cooking time: 45-55 minutes
Total time: About 5 hours (mostly waiting!)
Serving size: 16 generous bars
Why You’ll Love This Recipe
Why settle for one amazing dessert when you can have two? These bars offer the perfect texture contrast: a buttery, slightly crunchy cookie base, a smooth and rich cheesecake layer, and chunks of edible (egg-free!) cookie dough dotted throughout. They travel well, slice beautifully, and seriously disappear fast. It’s comfort food elevated!
Ingredients You’ll Need
We’ve broken the ingredients down into the three essential layers: the Crust, the Cheesecake Filling, and the Cookie Dough Topping.
For the Cookie Crust
- 1 cup (2 sticks) unsalted butter, softened
- 1 cup packed light brown sugar
- 2 large eggs
- 1 teaspoon vanilla extract
- 2 ¼ cups all-purpose flour
- 1 teaspoon baking soda
- ½ teaspoon salt
For the Cheesecake Filling
- 2 (8 ounce) packages full-fat cream cheese, softened
- 1 cup granulated sugar
- 2 large eggs
- 1 teaspoon vanilla extract
- 2 tablespoons heavy cream or sour cream
For the Edible Cookie Dough Topping
- ½ cup unsalted butter, softened
- ½ cup packed light brown sugar
- ¼ cup granulated sugar
- 1 teaspoon vanilla extract
- ½ cup all-purpose flour, heat-treated (see notes below)
- ¼ teaspoon salt
- ½ cup mini chocolate chips
Step-by-Step Instructions: Creating Magic
This process seems like a lot of steps, but I promise it’s just layering! Grab a 9×13 inch baking pan and line it with parchment paper, leaving an overhang for easy lifting later. Preheat your oven to 350°F (175°C).
Step 1: Making the Cookie Dough Base
1. In a large bowl, cream together the softened butter and brown sugar until light and fluffy (about 2-3 minutes).
2. Beat in the eggs one at a time, followed by the vanilla extract.
3. In a separate bowl, whisk together the flour, baking soda, and salt. Gradually add the dry ingredients to the wet ingredients, mixing just until combined. Don’t overmix!
4. Press about two-thirds of this dough evenly into the bottom of your prepared 9×13 pan. Save the remaining one-third for later.
5. Bake the crust for 12-15 minutes until the edges are just starting to turn golden. Let it cool slightly while you prepare the filling.
Step 2: Whipping Up the Cheesecake Filling
1. In a medium bowl, beat the softened cream cheese and granulated sugar until completely smooth and no lumps remain—this is crucial for a silky texture!
2. Beat in the eggs one at a time, mixing well after each addition.
3. Stir in the vanilla extract and heavy cream until just combined.
Step 3: Preparing the Edible Cookie Dough Topping
1. In a small bowl, beat the butter, brown sugar, and granulated sugar together until creamy.
2. Mix in the vanilla extract.
3. Stir in the heat-treated flour and salt until just combined.
4. Fold in the mini chocolate chips.
Step 4: Assembling and Baking
1. Pour the cheesecake filling evenly over the partially baked cookie crust.
2. Take the remaining one-third of the crust dough you set aside earlier. Crumble or lightly press small pieces evenly over the cheesecake filling.
3. Take the edible cookie dough you just made and drop small spoonfuls randomly over the top of the cheesecake layer. Use a butter knife to gently swirl some of the dough and cheesecake together if you like a marbled look.
4. Bake at 350°F (175°C) for 45 to 55 minutes. The center should be mostly set, meaning it jiggles only slightly when gently tapped.
5. Turn off the oven, prop the door open slightly, and let the bars cool in the oven for 30 minutes. This prevents cracking!
6. Remove from the oven and let cool completely on a wire rack. Once cool, chill in the refrigerator for at least 4 hours, but overnight is best for clean slicing.
Serving Suggestions
These bars are rich, so a small piece goes a long way!
- Classic Style: Serve chilled straight from the fridge.
- Warm Indulgence: Warm a slice slightly in the microwave (about 15 seconds) and top with a scoop of vanilla bean ice cream.
- Drizzle Delight: A thin drizzle of melted chocolate or caramel sauce takes these over the top!
Tips for Customization and Variations
This recipe is begging for creative twists!
- Nutty Crunch: Add ½ cup of chopped pecans or walnuts to the crust mixture before pressing it into the pan.
- Double the Dough: Instead of making just a topping, reserve half of your edible cookie dough mixture and bake it in small, separate balls alongside the bars. You get extra cookies!
- Flavor Boost: Add 1 teaspoon of espresso powder to the cheesecake filling for a mocha twist.
- Different Chips: Swap the chocolate chips for peanut butter chips or butterscotch chips.
Estimated Nutritional Information
Please note: This is a very rough estimate for one of 16 bars and should not be taken as official medical advice. These are decadent treats!
Calories: ~450-500 kcal
Fat: ~30g
Carbohydrates: ~45g
Protein: ~6g
Frequently Asked Questions (FAQs)
Q: Do I really need to heat-treat the flour for the cookie dough?
A: Yes, if you are making edible cookie dough, it is highly recommended! Flour can sometimes harbor bacteria, and heat-treating (baking it on a sheet pan at 350°F for 5 minutes until it reaches 160°F) kills any potential risks, ensuring your raw dough topping is safe to eat.
Q: My cheesecake filling cracked! What went wrong?
A: Cheesecake hates rapid temperature changes. The most common cause is opening the oven too soon or letting it cool down too fast. Make sure you use room temperature ingredients, and always follow the tip to let the bars cool slowly in the turned-off oven with the door propped open for that first 30 minutes.
Q: Can I freeze these bars?
A: Absolutely! Wrap cooled, unsliced bars tightly in plastic wrap, then aluminum foil, and freeze for up to 3 months. Thaw them overnight in the refrigerator before slicing and serving.
Happy baking, friends! Let me know in the comments how your Cookie Dough Cheesecake Bars turned out!