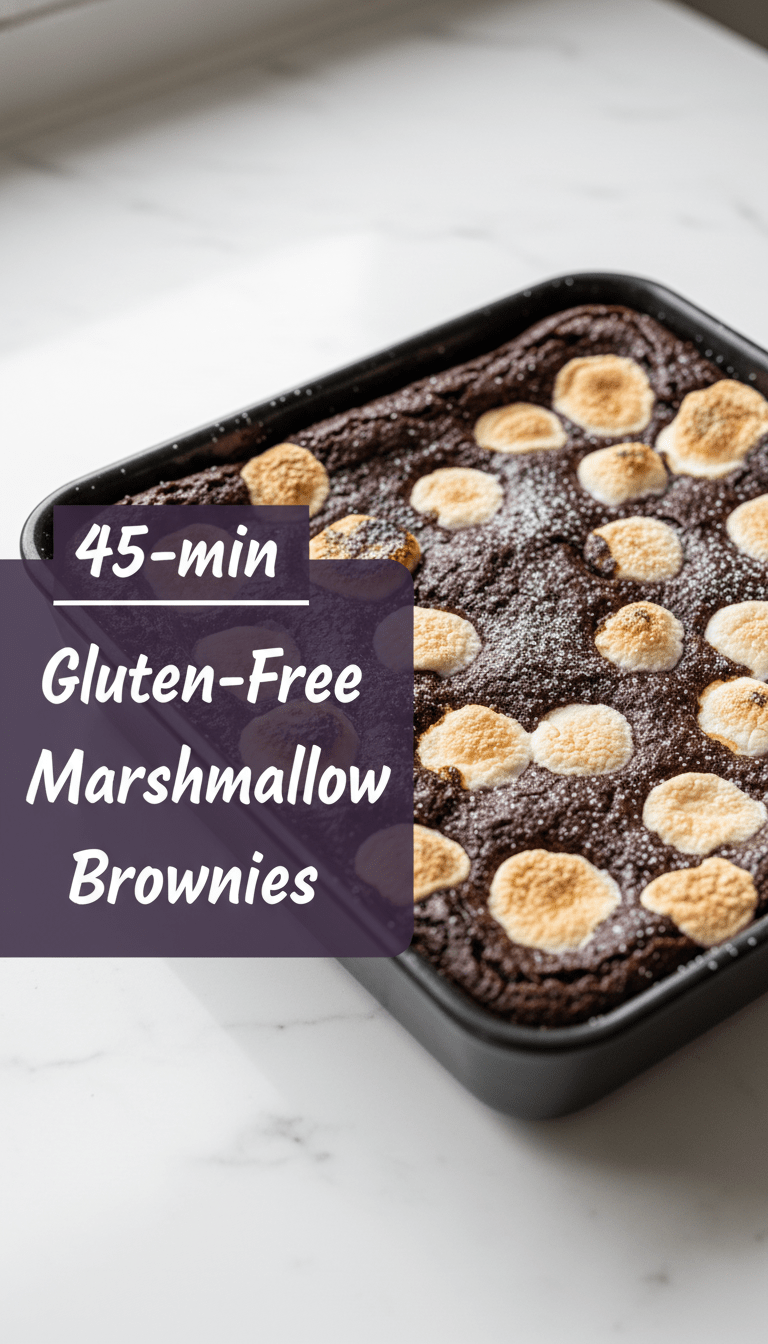
Hey everyone, and welcome back to the kitchen! If you’re anything like me, you know that sometimes you just need a truly decadent, soul-soothing treat. And what screams comfort more than a perfect brownie studded with gooey, melted marshmallows? It’s pure magic.
But what if I told you we could have this magic, even while keeping things gluten-free? Today, I’m sharing my absolute favorite recipe for Gluten-Free Marshmallow Brownies. These aren’t just good for gluten-free; they are genuinely the fudgiest, most intensely chocolatey brownies you’ll ever make, topped with that irresistible, slightly crispy marshmallow layer. Trust me, nobody will guess they’re GF!
Quick Facts
Prep time: 20 minutes
Cooking time: 30-35 minutes
Total time: About 55 minutes (plus cooling time!)
Serving size: 12 large squares
Why You’ll Love This Recipe
This recipe is a winner for so many reasons!
First, the texture is spot-on: deeply fudgy centers, slightly chewy edges, and that signature crackly top, all without a trace of gluten. Second, it’s remarkably easy. You mix it up in one bowl (less washing up, yay!). Finally, the marshmallow swirl takes these from a simple brownie to an event. They are perfect for potlucks, birthday parties, or just surviving a Tuesday evening!
Ingredients You’ll Need
Let’s gather our goodies! Make sure your butter is softened and your chocolate chips are high quality—it makes a difference!
For the Gluten-Free Brownie Base:
- 1 cup (2 sticks or 226g) unsalted butter, softened
- 1 ¾ cups granulated sugar
- ¾ cup packed light brown sugar
- 4 large eggs, room temperature
- 1 tablespoon vanilla extract
- 1 cup gluten-free all-purpose flour blend (ensure it contains xanthan gum, or add ½ teaspoon if it doesn’t)
- ¾ cup unsweetened cocoa powder (Dutch-processed is best for deep color)
- 1 teaspoon instant espresso powder (optional, but highly recommended to deepen the chocolate flavor)
- ½ teaspoon salt
- 1 cup (about 6 oz) semi-sweet chocolate chips or chunks
For the Marshmallow Topping:
- 3 cups mini marshmallows (check your brand for GF status if necessary, most standard brands are safe)
- 1 tablespoon unsalted butter (for greasing the pan)
Let’s Get Baking! Step-by-Step Instructions
Preheat your oven and prepare your pan first. This helps everything flow smoothly!
Step 1: Prep the Pan and Oven
Preheat your oven to 350°F (175°C). Line a 9×13 inch baking pan with parchment paper, leaving an overhang on the long sides. This sling makes removing the brownies so much easier later. Lightly grease the parchment paper with the extra tablespoon of butter.
Step 2: Creaming the Sugars and Butter
In a large bowl (or the bowl of a stand mixer), beat the softened butter, granulated sugar, and brown sugar together until light and fluffy—about 3 minutes. This step incorporates air, giving us that desirable crackly top!
Step 3: Adding the Wet Ingredients
Beat in the eggs one at a time, ensuring each is fully incorporated before adding the next. Mix in the vanilla extract. Scrape down the sides of the bowl.
Step 4: Mixing the Dry Ingredients
In a separate, medium bowl, whisk together the gluten-free flour blend, cocoa powder, salt, and instant espresso powder (if using).
Step 5: Combining Wet and Dry
Gently fold the dry ingredients into the wet mixture using a spatula. Mix just until no streaks of flour remain. Do not overmix! Overmixing gluten-free flour can lead to gummy brownies. Fold in the chocolate chips last.
Step 6: First Bake
Pour the batter into your prepared pan and spread it evenly. Bake for 25 minutes. The edges should look set, but the center will still look slightly wet.
Step 7: The Marshmallow Magic!
Remove the pan from the oven. Quickly and evenly scatter the 3 cups of mini marshmallows over the hot brownie batter.
Step 8: The Final Push
Return the pan to the oven for another 5 to 8 minutes. Watch carefully! You want the marshmallows to puff up and just start to turn golden brown on the peaks. If they are browning too fast, move the rack down.
Step 9: Cooling and Cutting
This is the hardest part—waiting! Remove the brownies from the oven and let them cool completely on a wire rack (at least 2 hours). If you try to cut them warm, the marshmallow layer will just melt everywhere. Once cooled, use the parchment paper sling to lift the whole slab out, then slice into squares.
Serving Suggestions
These brownies are fantastic on their own, but here are a few ways to elevate them:
- A la Mode: Serve warm (after cooling slightly, not piping hot!) with a scoop of vanilla bean ice cream.
- Drizzle: Once cooled, drizzle with melted dark chocolate for extra decadence.
- Coffee Companion: These pair perfectly with a strong black coffee or a cold glass of milk.
Tips for Customization and Variations
Want to make these even more personalized? Try these simple swaps:
- Nuts: Fold in ¾ cup of chopped pecans or walnuts along with the chocolate chips for added crunch.
- Swirl: Instead of topping entirely with marshmallows, reserve half the batter, mix the marshmallows into the reserved half, and then layer them over the bottom layer before baking for a gooey center swirl.
- Chocolate Power: Use dark chocolate chips instead of semi-sweet for an intensely rich, less sweet flavor profile.
Nutritional Information (Estimated)
Please note: This is a rough estimate based on standard ingredients and dividing the recipe into 12 servings. Exact macros will vary based on the specific brands of GF flour and chocolate used.
Per Serving (Estimate): Calories: 350-400, Fat: 20g, Carbohydrates: 45g, Protein: 4g.
Frequently Asked Questions (FAQs)
Q1: Can I use regular all-purpose flour instead of GF flour?
Absolutely! If you are not strictly gluten-free, you can substitute the GF blend with standard all-purpose flour at a 1:1 ratio. The baking time and texture should remain very similar.
Q2: Why are my marshmallows not browning?
Marshmallows brown best under direct, dry heat. If your oven’s top rack is far from the broiler, or if your oven runs cool, the top layer might just melt without browning. For a quick fix next time, after the 5-8 minute bake, switch the oven to the broil setting for 30-60 seconds. Watch them constantly—they go from perfect to burnt in a blink!
Q3: Can these be made ahead of time?
Yes! Gluten-Free Marshmallow Brownies store beautifully. Keep them tightly covered in an airtight container at room temperature for up to 4 days. They often taste even better the next day once they fully set.
Happy baking, everyone! Let me know in the comments when you try this ultimate comfort bake!