Hello there, fellow food lovers! Are you ready for a trip down memory lane? Today, we’re tackling the icon, the legend, the king of simple comfort food: the Grilled Cheese Sandwich. Forget those sad, pale versions you might have had as a kid. We’re leveling up this classic to achieve that perfect crunch on the outside and a molten, stringy cheese pull on the inside. Trust me, once you try this method, you’ll never go back!
Quick Facts
Prep time: 5 minutes
Cooking time: 8 minutes
Total time: 13 minutes
Serving size: 1 Sandwich
Why You’ll Love This Recipe
This isn’t just any grilled cheese. We are focusing on technique—low and slow heat, the right fat, and perfect bread synergy—to create a sandwich that is golden brown everywhere, not just in patches. It’s fast, requires ingredients you already have, and delivers pure, unadulterated happiness in every bite. It’s the ultimate 13-minute vacation!
The Essential Ingredients
To make this masterpiece, you don’t need much, but quality counts!
- 2 slices of good quality bread (Sourdough, Pullman loaf, or even classic white bread works great)
- 2 tablespoons unsalted butter, softened to room temperature (This is key!)
- 2 slices of cheese (I recommend a mix: one slice of sharp cheddar for flavor and one slice of Monterey Jack or American for meltiness)
Step-by-Step Instructions: Achieving Perfection
Follow these steps closely, especially regarding the heat, and you will be rewarded!
Step 1: Prep Your Buttered Bread Canvas
1. Lay your two slices of bread flat on a clean cutting board.
2. Take your softened butter and spread an even, generous layer all the way to the edges on one side of each slice. This buttered side will be the outside of your sandwich.
3. Now, take one slice (butter-side down) and place it on your work surface. Layer your cheeses evenly on top of the unbuttered side.
4. Top with the second slice of bread, making sure the buttered side is facing up. You now have a perfectly assembled, un-grilled sandwich!
Step 2: The Low and Slow Sizzle
1. Place a non-stick skillet or a cast-iron pan over low to medium-low heat. This is crucial. High heat burns the bread before the cheese even starts to melt.
2. Once the pan is warm (not smoking hot!), gently place your assembled sandwich into the dry pan. Do not add extra butter to the pan! We are using the butter already on the bread.
Step 3: The Golden Transformation
1. Let the sandwich cook undisturbed for about 4 to 5 minutes. You are looking for a deep, even golden-brown color on the bottom slice. Resist the urge to press down hard—let the heat do the work.
2. Peek underneath with a spatula. When it’s beautifully golden, it’s time to flip!
3. Carefully flip the sandwich. Cook the second side for another 3 to 4 minutes, again aiming for that perfect golden hue. If the heat seems too high, reduce it further.
Step 4: The Grand Finale
1. Once both sides are perfectly toasted and you can see the cheese just starting to ooze slightly from the sides, remove the sandwich from the pan.
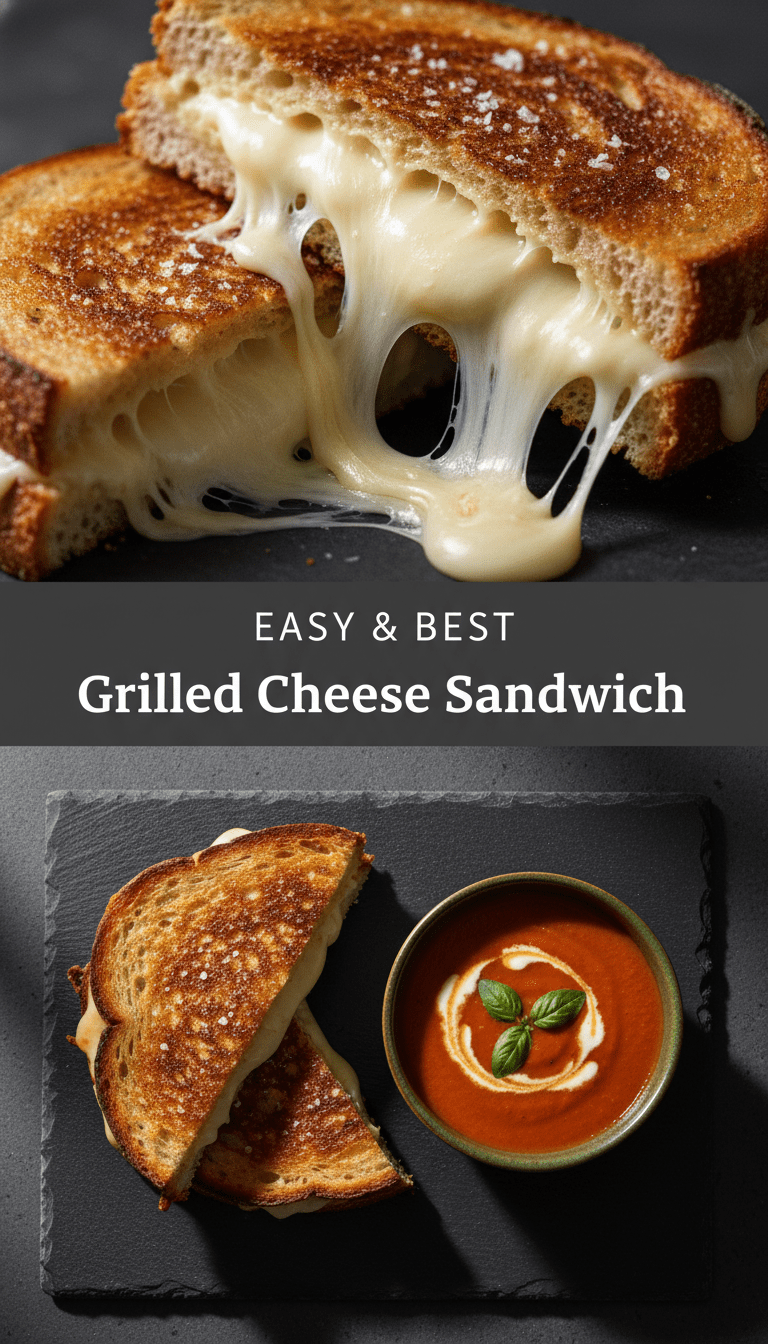
2. Immediately place it on a cutting board and slice it diagonally. That perfect cross-section view is non-negotiable! Serve immediately.
Serving Suggestions
A grilled cheese is great on its own, but it truly shines when paired with something acidic or savory to cut through the richness:
- The Classic Dip: A warm bowl of creamy tomato soup. Non-negotiable!
- Tangy Side: A small cup of homemade pickle spears or tangy coleslaw.
- For the Grown-Ups: Serve alongside a small side salad dressed with a sharp vinaigrette.
Tips for Customization & Variations
Want to get creative? Grilled cheese is the perfect blank slate!
- Spice It Up: Add a thin layer of Dijon mustard or a sprinkle of smoked paprika on the inside before adding the cheese.
- The Herbaceous Touch: Mix a teaspoon of finely chopped fresh chives or thyme into your softened butter before spreading it on the bread.
- Cheese Swap: Try Gruyère for nuttiness, Pepper Jack for a kick, or a blend of three cheeses!
- The Mayo Method: For an extra-crispy crust, some people swear by substituting mayonnaise for butter on the outside of the bread. Try it once!
Nutritional Information (Estimated per Sandwich)
Please note: These are rough estimates and will vary widely based on the type of bread and cheese used.
Calories: 350 – 450
Protein: 18g – 25g
Fat: 22g – 30g
Carbohydrates: 20g – 25g
Frequently Asked Questions (FAQs) About Grilled Cheese
Q1: What is the best type of cheese for a great “cheese pull”?
A: Cheeses that melt well and have high moisture content, like Monterey Jack, American cheese, Fontina, or young Gouda, are best for that epic stringy pull. Mixing a good melter with a flavor powerhouse (like sharp cheddar) is the sweet spot.
Q2: Should I cover the pan while cooking?
A: Covering the pan for the last minute of cooking on the second side can trap some steam, helping the cheese melt through completely without burning the outside. If your cheese is naturally slow to melt, this is a great hack!
Q3: Can I make this vegan or dairy-free?
A: Absolutely! Use your favorite non-dairy butter substitute (Miyoko’s Kitchen butter is fantastic) and vegan cheese slices. The technique remains the same—low and slow heat is your best friend when working with vegan cheeses.
Q4: What if my bread is too thin?
A: If your bread is delicate, use slightly lower heat and perhaps use only one slice of cheese to prevent the structure from collapsing under the weight of the molten cheese. Thicker, heartier bread handles the heat and butter better!