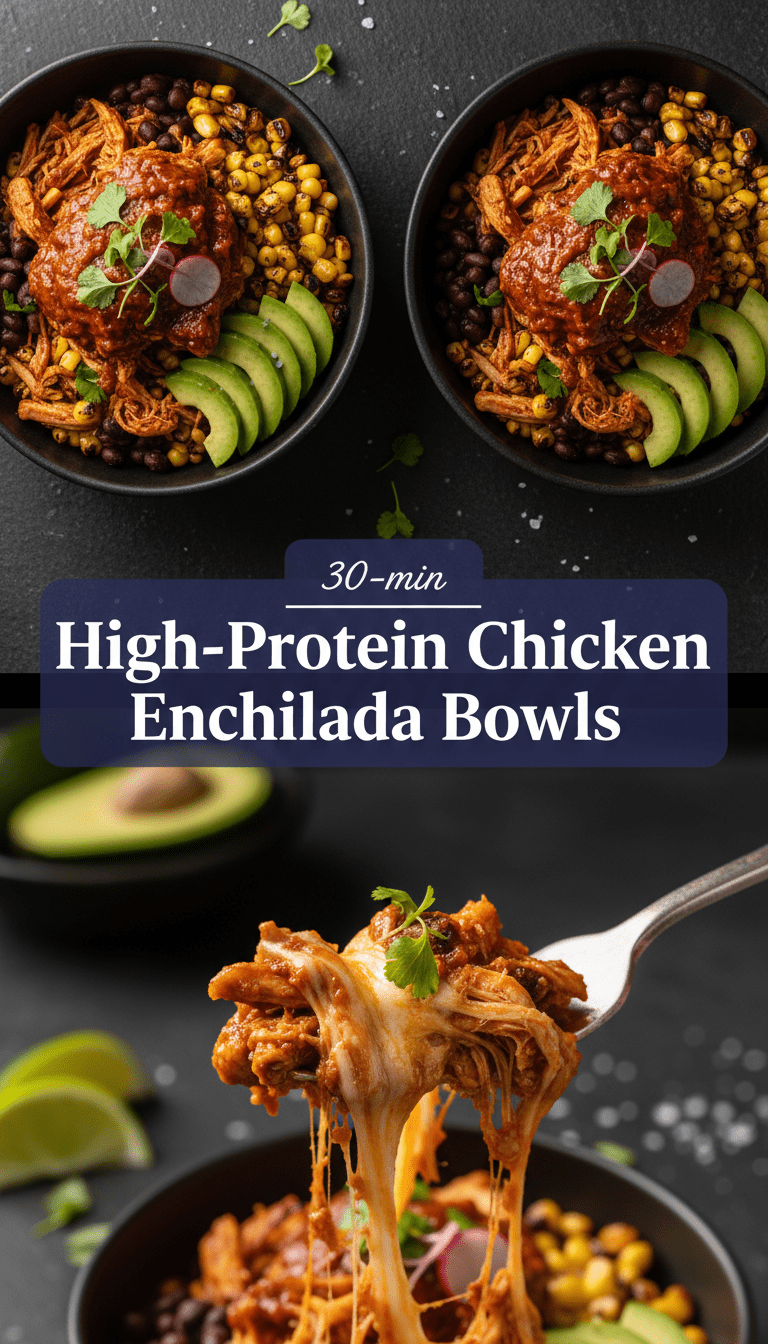
Hey there, food lovers! If you’re anything like me, you crave that comforting, cheesy goodness of enchiladas, but sometimes you just don’t have the time (or the desire) to roll a million little tortillas. Plus, we all know that protein boost is essential for keeping us energized!
That’s why I’m absolutely thrilled to share my favorite creation: High-Protein Chicken Enchilada Bowls. Think all the amazing, vibrant flavors of your favorite enchiladas—savory sauce, tender chicken, and melty cheese—layered beautifully over a base that keeps you full and happy for hours. Forget the mess; this is flavor packed into one easy bowl! Let’s get cooking!
Quick Facts
Prep time: 15 minutes
Cooking time: 25 minutes
Total time: 40 minutes
Serving size: 4 generous bowls
Why You’ll Love This Recipe
This recipe is a total game-changer! First off, it’s incredibly satisfying—the combination of lean chicken and hearty black beans pumps up the protein content without sacrificing flavor. Secondly, it’s so quick! We’re skipping the rolling step, which saves major time, making it perfect for busy weeknights. Finally, these bowls are highly customizable, meaning you can tailor them exactly to your cravings every single time. It’s comfort food, but smart comfort food!
Ingredients You’ll Need
This recipe is divided into three simple parts: the chicken base, the sauce, and the toppings.
For the Protein Base:
- 1 tablespoon olive oil
- 1 medium yellow onion, chopped
- 2 cloves garlic, minced
- 1.5 lbs boneless, skinless chicken breasts or thighs, cooked and shredded (rotisserie chicken works great!)
- 1 (15-ounce) can black beans, rinsed and drained
- 1 cup frozen or fresh corn kernels
- 1 teaspoon chili powder
- 1/2 teaspoon ground cumin
- Salt and black pepper to taste
For the Enchilada Sauce Layer:
- 1 (10-ounce) can red enchilada sauce (mild, medium, or hot, depending on your preference!)
- 1/2 cup low-sodium chicken broth
- 1/2 cup plain Greek yogurt (this is our secret protein booster!)
- 1 teaspoon cornstarch mixed with 1 tablespoon cold water (optional, for thickening)
For Assembly and Toppings:
- 2 cups cooked brown rice or quinoa (for a lower-carb option, use cauliflower rice)
- 1 cup shredded Monterey Jack or Mexican blend cheese
- Fresh cilantro, chopped (for garnish)
- Avocado or guacamole slices
- A dollop of sour cream or extra Greek yogurt (optional)
Step-by-Step Assembly Instructions
Making these bowls is incredibly straightforward. We’re essentially creating a delicious, saucy chicken filling and layering it over a base.
H3: Step 1: Sauté the Aromatics
Heat the olive oil in a large skillet or Dutch oven over medium heat. Add the chopped onion and cook until softened, about 5 minutes. Add the minced garlic and cook for another minute until fragrant.
H3: Step 2: Build the Chicken Filling
To the skillet, add your already cooked and shredded chicken, the rinsed black beans, and the corn. Sprinkle in the chili powder, cumin, salt, and pepper. Stir everything well to combine and let it heat through for about 3 minutes.
H3: Step 3: Create the Creamy Enchilada Sauce
In a separate small bowl, whisk together the red enchilada sauce and the chicken broth. Then, gently whisk in the plain Greek yogurt until smooth. Tip: Make sure the yogurt is room temperature or slightly warmed so it doesn’t curdle when mixing with the sauce. Pour this mixture over the chicken filling in the skillet. Stir gently until everything is nicely coated and heated through. If you prefer a slightly thicker sauce, stir in the cornstarch slurry now and let it simmer for one minute until it thickens slightly.
H3: Step 4: The Final Bake (The Cheesy Finish!)
Preheat your oven broiler. Divide the cooked rice or quinoa evenly among four oven-safe bowls (or use a single 9×9 baking dish for a casserole style). Spoon the saucy chicken mixture generously over the rice base in each bowl. Sprinkle the shredded cheese evenly over the top of each bowl.
Carefully place the bowls under the broiler for 2 to 4 minutes, watching very closely, until the cheese is melted, bubbly, and just starting to turn golden brown.
H3: Step 5: Garnish and Serve!
Remove the bowls from the oven carefully (they will be very hot!). Top immediately with fresh cilantro, avocado slices, and an extra dollop of Greek yogurt or sour cream if desired. Serve immediately and enjoy the best enchilada experience without the rolling!
Serving Suggestions
These bowls are fantastic on their own, but here are a few ways to make them even better:
- For Crunch: Add a sprinkle of crushed tortilla chips just before serving.
- Extra Heat: A dash of your favorite hot sauce on top really wakes up the flavor.
- Freshness Factor: A squeeze of fresh lime juice brightens up the richness beautifully.
Tips for Customization & Variations
This recipe is built for flexibility!
1. Swap the Protein: Don’t have chicken? Ground turkey or shredded lean ground beef works perfectly. Just brown the ground meat first before adding the other ingredients.
2. Vegetarian Power: Omit the chicken and double the amount of black beans, adding cooked lentils or crumbled tofu for texture and protein.
3. Sauce Level: If you hate store-bought sauce, you can make a quick homemade sauce using chili powder, onion powder, garlic powder, oregano, and flour/broth.
4. Make it Ahead: You can prepare the chicken filling (Steps 1-3) completely ahead of time and store it in the fridge for up to 3 days. Just assemble, top with cheese, and broil when you’re ready to eat!
Estimated Nutritional Information
Please note: This is a rough estimate based on using lean chicken, Greek yogurt, brown rice, and moderate cheese. Exact values will vary based on specific brands and topping choices.
Per Serving (approximate): 450-550 calories, 40-45g Protein, 40g Carbohydrates, 15g Fat.
Frequently Asked Questions (FAQs)
Q: Can I make this recipe ahead of time?
A: Yes! You can absolutely assemble the entire bowl (rice, chicken mixture, and cheese) up to the point of broiling. Cover it tightly and refrigerate for up to 24 hours. When ready to eat, simply remove the plastic wrap and broil until hot and bubbly.
Q: Why do you use Greek yogurt in the sauce?
A: Greek yogurt is my secret weapon for boosting the protein content while adding a wonderful, slight tanginess that mimics traditional Mexican crema. It keeps the sauce creamy without adding a ton of extra fat or heavy cream.
Q: What if I don’t like rice or quinoa?
A: No problem at all! These bowls are excellent over shredded lettuce for a low-carb “taco salad” feel, or layered on top of roasted sweet potatoes for added nutrients.
Q: Can I freeze these bowls?
A: It’s best to freeze the chicken filling only. Freeze the cooked filling in an airtight container. When reheating, thaw it, add a splash of broth or water, heat through, and then assemble fresh bowls with new rice and toppings. Freezing pre-assembled bowls with cheese and rice often results in a less appealing texture once reheated.