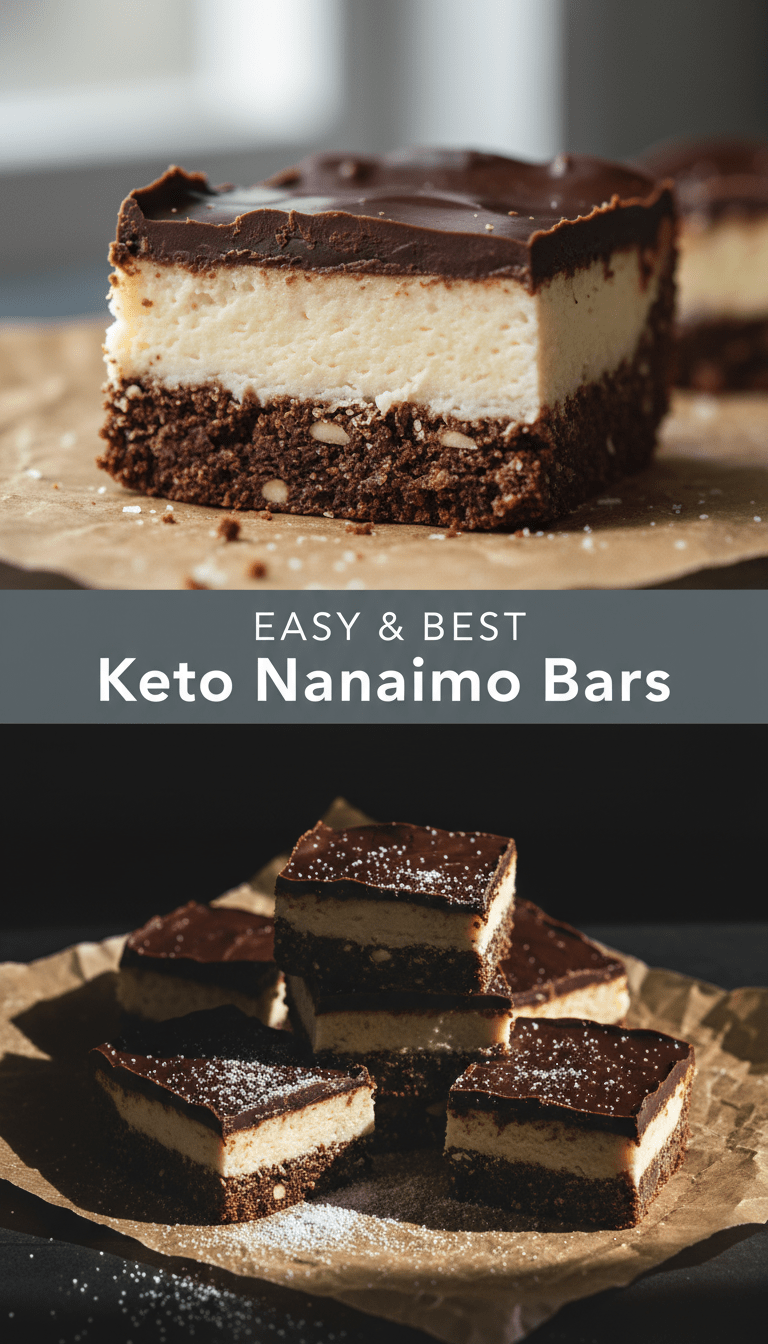
Hey everyone, and welcome back to the kitchen! If you’ve ever been craving a taste of pure, no-bake bliss but trying to stick to your keto goals, you are in for a treat today. We are tackling one of the most iconic Canadian desserts: the Nanaimo Bar. Traditionally loaded with sugar and graham crackers, my version keeps all that decadent, three-layer goodness while keeping the carbs way down. These Keto Nanaimo Bars are creamy, crunchy, and totally unforgettable. Trust me, even your non-keto friends will be asking for the recipe!
Quick Facts
Here’s a snapshot so you can plan your baking (or, well, no-baking) adventure!
Prep time: 25 minutes
Chilling time: 3-4 hours (minimum)
Total time: About 4 hours 25 minutes
Serving size: 16 bars
Why You’ll Love This Recipe
Why settle for less when you can have the best of both worlds?
- No Oven Required: Seriously, just mix and chill! Perfect for those hot summer days.
- Triple Layer Heaven: You get a satisfyingly crunchy base, a creamy, sweet custard filling, and a smooth chocolate top. Textural perfection!
- Keto-Friendly: We swap out sugar and traditional crackers for almond flour and sweeteners, making this a truly keto-compliant treat.
- Make Ahead Champion: These bars taste even better the next day, making them ideal for meal prep or parties.
Ingredients You’ll Need
We’ll break this down by layer so it’s super easy to follow.
Layer 1: The Nutty Base
- 1 cup almond flour (super-fine works best)
- 1/2 cup unsweetened shredded coconut
- 1/4 cup granulated keto-friendly sweetener (like erythritol or xylitol—use monk fruit/stevia blend for best results)
- 1/4 cup melted unsalted butter
- 2 tablespoons unsweetened cocoa powder
- 1/2 teaspoon vanilla extract
Layer 2: The Creamy Custard Filling
- 1/2 cup softened cream cheese (full fat is best)
- 1/2 cup unsalted butter, softened
- 2 cups powdered keto-friendly sweetener (powdered monk fruit or erythritol)
- 1 teaspoon vanilla extract
- 1/2 teaspoon butter flavoring (optional, but highly recommended for that authentic taste!)
Layer 3: The Chocolate Topping
- 1/2 cup sugar-free chocolate chips (or chopped keto dark chocolate)
- 2 tablespoons coconut oil (or butter)
Step-by-Step Instructions: Building Your Masterpiece
Line an 8×8 inch baking pan with parchment paper, leaving an overhang on two sides. This sling makes removal a breeze later!
Step 1: Creating the Crunchy Base
1. In a medium bowl, mix together the almond flour, shredded coconut, powdered sweetener, and cocoa powder.
2. Pour in the melted butter and vanilla extract.
3. Use a fork or your hands to mix until everything is thoroughly combined and it resembles wet sand.
4. Press this mixture firmly and evenly into the bottom of your prepared pan. Use the bottom of a measuring cup to really pack it down!
5. Place the pan in the freezer while you prepare the next layer—about 10 minutes.
Step 2: Whipping Up the Custard Center
1. In a separate bowl (or stand mixer), beat the softened cream cheese and butter together until light and fluffy. Make sure they are truly soft to avoid lumps!
2. Gradually add the powdered sweetener, vanilla extract, and butter flavoring (if using). Beat until completely smooth and no grainy texture remains. This filling should be thick!
3. Retrieve your crust from the freezer. Carefully spread the custard mixture evenly over the chilled base layer. Smooth the top with an offset spatula.
4. Return the pan to the refrigerator and chill for at least 1 hour, or until the filling is firm to the touch.
Step 3: Melting the Chocolate Finish
1. Once the filling is set, prepare the topping. In a small, microwave-safe bowl, combine the sugar-free chocolate chips and coconut oil.
2. Microwave in 20-second bursts, stirring well after each interval, until smooth and glossy.
3. Pour the melted chocolate evenly over the chilled custard layer. Tilt the pan gently to ensure full coverage.
4. Return the bars to the refrigerator for at least 2 more hours, or until the chocolate is completely set.
Step 4: Slice and Enjoy!
1. Use the parchment paper overhang to lift the entire slab out of the pan.
2. Use a large, sharp knife (wiping it clean between cuts helps for cleaner lines!) to slice the block into 16 even squares.
Serving Suggestions
These bars are rich, so a little goes a long way!
Serve them straight from the fridge for a firm, fudgy bite. They pair wonderfully with a hot cup of black coffee or a cup of unsweetened almond milk latte. For an extra festive touch, dust the tops lightly with a tiny bit of unsweetened cocoa powder just before serving.
Tips for Customization and Variations
Want to switch things up? Here are a few ideas to play with:
- Nut Swap: If you have a tree nut allergy, you can substitute sunflower seed flour for the almond flour, though the texture will change slightly.
- Mocha Kick: Add 1 teaspoon of instant espresso powder to the chocolate topping for a mocha flavor explosion!
- Spice it Up: Add 1/4 teaspoon of cinnamon or a pinch of nutmeg to the base layer for warmth.
- Healthier Fats: For the filling, you can substitute 1/4 cup of the butter with high-quality coconut cream (the solid part from a can of refrigerated full-fat coconut milk) for a slightly lighter texture.
Estimated Nutritional Information
(Note: Nutrition facts are highly dependent on the specific keto sweeteners and chocolate brand used. This is a rough estimate for one of 16 bars.)
Calories: Approx. 210-230
Net Carbs: Approx. 3-4g
Fat: Approx. 20g
Protein: Approx. 3g
Frequently Asked Questions (FAQs)
Q: Can I use regular sugar instead of keto sweetener?
A: If you use regular sugar, this recipe will no longer be keto. Using regular sugar will also drastically change the texture, as the powdered sweetener helps bind the filling without adding liquid. For the authentic texture, please stick to a powdered keto alternative.
Q: How long do Keto Nanaimo Bars last?
A: Because these bars contain cream cheese and butter, they should be stored in an airtight container in the refrigerator. They will stay fresh and delicious for up to 7 days. They also freeze wonderfully for up to 3 months!
Q: Why is my chocolate layer cracking when I cut the bars?
A: This is usually due to the temperature difference. Make sure the custard layer is firmly chilled before pouring the chocolate on top. Also, slightly warming your knife blade under hot water (and drying it quickly) before slicing through the set chocolate can help prevent that messy crackle.
Enjoy baking (and chilling!) this classic treat the keto way. Happy snacking!