Hey food lovers! Welcome back to my kitchen. Today, we’re diving into a recipe that’s super simple yet incredibly rewarding: Labneh. If you’ve ever had thick, creamy, slightly tangy yogurt cheese at a Mediterranean restaurant and wondered how they do it, guess what? You can make it at home with just one ingredient!
Labneh isn’t really “cheese” in the traditional sense; it’s essentially strained yogurt. But trust me, once you try this spread—perfect for dipping, slathering on toast, or drizzling with olive oil—you’ll be hooked. It’s healthier than cream cheese and so much more versatile. Let’s get making this magic happen!
Quick Facts
Prep time: 15 minutes (plus straining time)
Cooking time: 0 minutes
Total time: Active time is minimal; total time depends on straining (6 to 24 hours)
Serving size: Makes about 1.5 cups of labneh
Why You’ll Love This Recipe
This recipe is the definition of minimal effort, maximum reward. You don’t need any special equipment, and the process is almost entirely hands-off. I love it because:
1. It turns inexpensive plain yogurt into a gourmet spread.
2. It’s incredibly versatile—sweet or savory!
3. It’s naturally rich in protein.
4. It lasts for days in the fridge, ready for impromptu snacks.
What You Need: The Ingredients List
This recipe is wonderfully minimalist!
- 1 quart (about 4 cups) whole milk plain yogurt (Full-fat Greek yogurt works best for speed, but regular plain yogurt works too!)
- 1 teaspoon fine sea salt (or more, to taste)
- Optional: A good quality extra virgin olive oil for serving
- Optional: Za’atar or fresh herbs for topping
Let’s Make It: Step-by-Step Instructions
The secret to amazing labneh is patience. Don’t rush the straining process!
Step 1: Seasoning the Yogurt
In a medium bowl, gently mix the salt into the plain yogurt until it’s evenly distributed. Make sure you use fine salt so it dissolves well.
Step 2: Setting Up the Strainer
This is where the “cheese-making” happens. You need a way to let the whey (the watery part of the yogurt) drain away.
1. Line a colander (or a large sieve) with two or three layers of cheesecloth or a clean, thin kitchen towel. If you don’t have cheesecloth, a sturdy coffee filter or a few layers of paper towels can work in a pinch, but cheesecloth yields the best results.
2. Place the lined colander over a large bowl. This bowl will catch the whey—save this whey! It’s great for baking bread or making smoothies.
Step 3: The Waiting Game (Straining)
1. Spoon the salted yogurt mixture into the prepared cheesecloth-lined colander.
2. Gather the edges of the cheesecloth/towel up and tie them loosely with kitchen twine, creating a little pouch of yogurt. You can also just fold the cloth over the top.
3. Place the entire setup (colander over the bowl) in the refrigerator.
Step 4: Determining Your Thickness
Now we wait. The longer it strains, the thicker your labneh will become.
- For a thick dip consistency (like thick sour cream): Strain for 6 to 8 hours.
- For a spreadable, cream cheese texture: Strain for 12 to 18 hours.
- For true, firm cheese balls (the traditional way): Strain for 20 to 24 hours.
Check it periodically. When the whey has stopped dripping significantly and the yogurt feels very dense, you are done!
Step 5: Final Touches
Gently scrape the thick labneh out of the cheesecloth and transfer it to a clean serving bowl or airtight container. Taste it and add a tiny pinch more salt if needed.
How to Serve Your Creamy Delight
Labneh is fantastic any time of day. Here are my favorite ways to enjoy it:
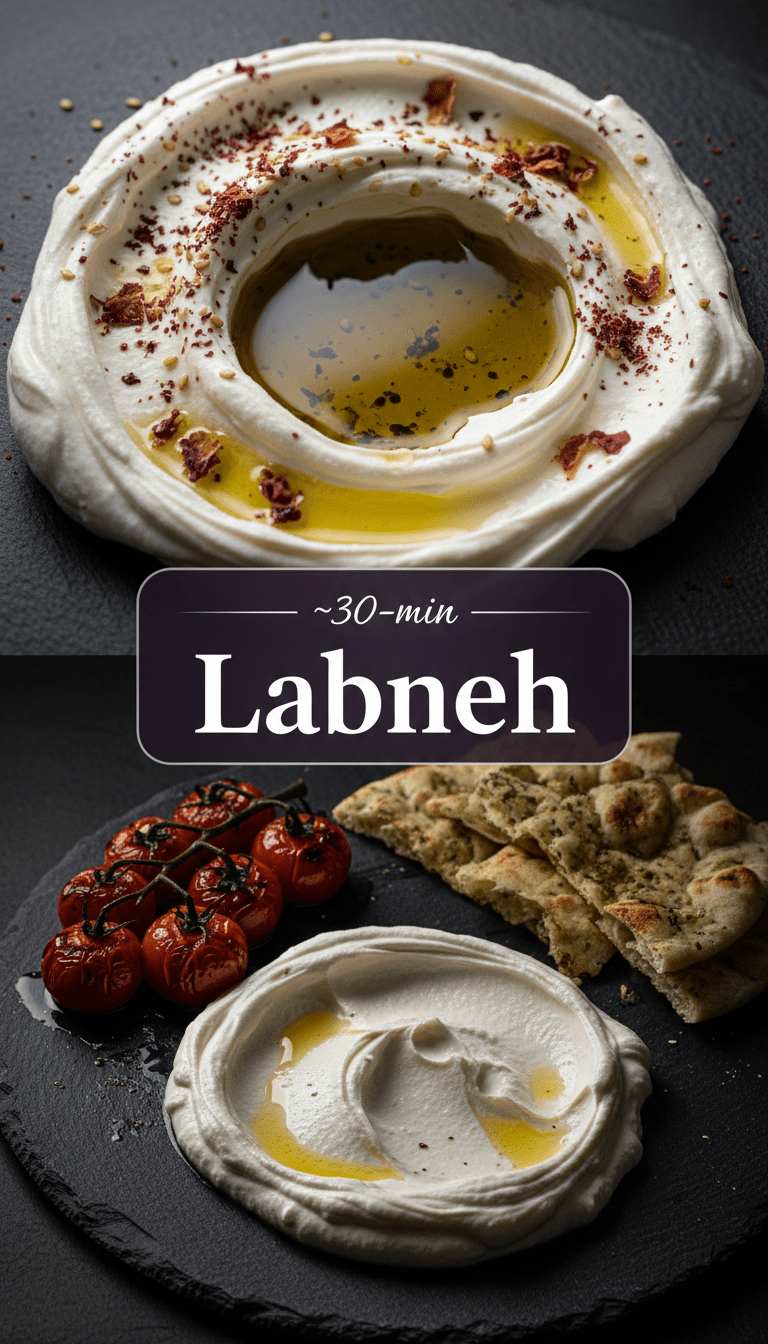
- The Classic Mezze: Spread generously onto a flatbread or pita. Drizzle heavily with high-quality extra virgin olive oil. Sprinkle with Za’atar spice blend and a pinch of fresh mint or black pepper.
- Breakfast Boost: Use it as a healthier swap for cream cheese on bagels or toast.
- Savory Dip: Serve alongside fresh cucumber sticks, cherry tomatoes, and olives as part of a healthy appetizer platter.
- Sweet Treat: A small dollop topped with fresh berries, a drizzle of honey, and chopped pistachios makes a wonderful light dessert.
Tips for Customization and Variations
Want to take your homemade labneh to the next level? Try these additions:
1. Garlic Infusion: While the yogurt is straining, soak a few peeled cloves of garlic in a little olive oil. Drizzle this infused oil over the finished labneh just before serving.
2. Herbed Labneh: After straining, mix in finely chopped dill, chives, or parsley.
3. Spicy Kick: Add a pinch of Aleppo pepper or chili flakes directly into the strained labneh for a gentle heat.
4. Rolling Cheese Balls: If you strained yours until very thick (24+ hours), you can roll the labneh into small balls and preserve them submerged entirely in olive oil, seasoned with herbs like rosemary or thyme.
Nutritional Information (Estimated per 1/4 Cup Serving)
Since this is made from whole milk yogurt, it’s satisfyingly rich. Exact values depend heavily on the starting yogurt fat content.
- Calories: 100-130 kcal
- Protein: 5-7g
- Fat: 8-10g
- Carbohydrates: 3-4g
Frequently Asked Questions (FAQs) About Labneh
Q1: Can I use non-fat or low-fat yogurt?
A: Yes, you absolutely can! However, you will get a much lower yield (less final product), and the texture might feel slightly less luxurious. Whole milk yogurt yields the creamiest, most satisfying labneh.
Q2: My labneh isn’t getting thick enough! What went wrong?
A: Patience is key! If it’s been 12 hours and it still seems very wet, ensure your straining setup isn’t leaking. If you used very liquid yogurt (not Greek style), you might need to strain for closer to 24 hours. You can also try tying the cheesecloth tighter to encourage more whey removal.
Q3: How long does homemade labneh last in the refrigerator?
A: Stored in an airtight container, homemade labneh usually stays fresh and delicious for 7 to 10 days. If you drizzle a layer of olive oil over the top before sealing, it can help extend that freshness slightly.
Q4: Can I use the leftover whey?
A: Yes! The whey is nutritious and slightly acidic. Use it as a direct substitute for water when kneading bread dough, or blend it into smoothies for an extra protein and nutrient boost. Don’t waste it!
Happy straining, everyone! Let me know in the comments when you try this incredible, simple spread.