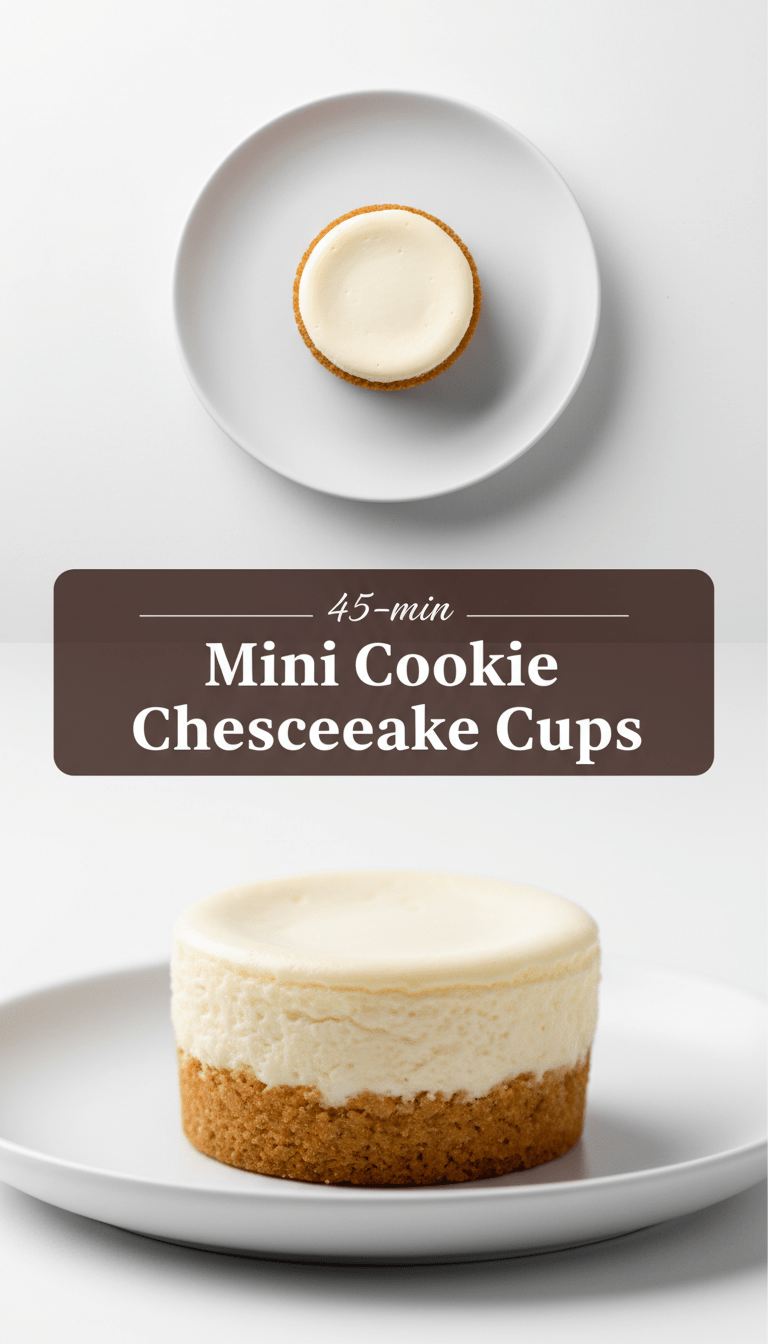
Hey everyone, and welcome back to the kitchen! If you’re anything like me, sometimes you crave that creamy, tangy bliss of cheesecake but don’t want the commitment of baking a whole giant one—or dealing with that pesky water bath! Well, do I have the solution for you today. We are diving headfirst into Mini Cookie Cheesecake Cups!
These little beauties combine a crunchy cookie base, a rich, velvety cheesecake filling, and they are completely no-bake. That means less stress, more snacking! They are perfect for parties, quick weeknight treats, or just when that craving hits. Let’s get mixing!
Quick Facts
Here’s the lowdown on how quickly you can be enjoying these delicious cups:
Prep time: 20 minutes
Chill time: Minimum 2 hours
Total time: About 2 hours 20 minutes
(mostly chilling!)
Serving size: Makes 12 standard muffin-tin sized cups
Why You’ll Love This Recipe
Honestly, what’s not to love?
- No Oven Required: Seriously, it’s all about mixing and chilling. Perfect for hot weather!
- Portion Control Heaven: They are naturally portioned, making them incredibly easy to serve and preventing that awkward “one more slice” dilemma.
- Cookie Base Power: We’re skipping the graham crackers for something a little more fun—your favorite chocolate chip cookies! Hello, texture upgrade!
- Incredibly Creamy: The filling sets up beautifully smooth and utterly decadent.
Ingredients You’ll Need
Gather your goodies! This recipe is straightforward, relying on simple pantry staples.
For the Cookie Crust:
- 1 ½ cups finely crushed chocolate chip cookies (about 20-24 cookies)
- 4 tablespoons unsalted butter, melted
For the No-Bake Cheesecake Filling:
- 8 ounces (one block) full-fat cream cheese, softened to room temperature
- ½ cup granulated sugar
- 1 teaspoon pure vanilla extract
- 1 cup heavy whipping cream (very cold)
- 1 tablespoon fresh lemon juice (this helps stabilize it!)
For Topping (Optional but Recommended!):
- Extra cookie crumbs
- Mini chocolate chips or fresh berries
Step-by-Step Magic: Creating Your Mini Cups
Don’t worry, these steps are super easy. Grab a standard 12-cup muffin tin and line it with paper liners.
Step 1: Building the Cookie Base
1. Place your cookies in a food processor and pulse until you have fine crumbs. If you don’t have a processor, seal them in a sturdy Ziploc bag and crush them with a rolling pin—that’s a great arm workout!
2. In a medium bowl, mix the cookie crumbs and the melted butter until the crumbs are evenly moistened, like wet sand.
3. Spoon about 1 ½ tablespoons of the mixture into the bottom of each lined muffin cup. Use the bottom of a small glass or a spoon to firmly press the crumbs down to create an even base.
4. Pop the muffin tin into the freezer while you prepare the filling (about 10 minutes).
Step 2: Whipping Up the Creamy Filling
1. In a large bowl (or the bowl of a stand mixer), beat the softened cream cheese, granulated sugar, and vanilla extract until it is completely smooth and fluffy—no lumps allowed! Scrape down the sides as needed.
2. In a separate, chilled bowl, use an electric mixer to whip the cold heavy cream until stiff peaks form. This usually takes 3 to 5 minutes on medium-high speed. Be careful not to over-whip it into butter!
3. Gently fold the whipped cream into the cream cheese mixture until just combined. You want to keep all that lovely air in there!
4. Finally, fold in the lemon juice.
Step 3: Filling and Chilling
1. Spoon or pipe the cheesecake filling evenly over the chilled cookie bases in the muffin tin. Fill them right up to the top!
2. Sprinkle your chosen toppings (extra crumbs or berries) over the top of each cup now.
3. Cover the muffin tin loosely with plastic wrap and transfer it to the refrigerator. Let them chill for at least 2 hours, or until the filling is firm enough to hold its shape. If you are in a real rush, 30 minutes in the freezer works, but the fridge is best for texture.
Serving Suggestions
These are great straight from the fridge! For an extra touch of elegance, serve them chilled alongside a strong cup of coffee or espresso. They are fantastic as part of a dessert platter because they are already perfectly portioned for guests.
Tips for Customization and Variations
This recipe is a fantastic canvas! Feel free to experiment:
- Different Cookies: Swap the chocolate chip cookies for Oreos (keep the filling the same), peanut butter cookies, or vanilla wafers.
- Flavor Infusions: Add 1 tablespoon of dissolved instant espresso powder to the cream cheese mixture for a mocha cheesecake cup, or a teaspoon of peppermint extract for a minty twist.
- Swirled Toppings: Before chilling, drizzle a tablespoon of warmed caramel or chocolate sauce over the top of each cup and use a toothpick to swirl it gently into the filling.
Nutritional Information (Estimated)
Please remember these are rough estimates and will vary based on the exact brands and amount of toppings used.
Per serving (1 mini cup, without heavy toppings):
Calories: Approximately 220-250
Fat: 17g
Carbohydrates: 16g
Protein: 3g
Frequently Asked Questions (FAQs)
Q1: Can I make these ahead of time?
A1: Absolutely! These Mini Cookie Cheesecake Cups are best made a day ahead. They hold up beautifully in the refrigerator for up to 4 days when covered tightly.
Q2: My filling isn’t setting up. What went wrong?
A2: This is almost always related to the cream cheese or the heavy cream. Make sure your cream cheese was truly at room temperature (soft but not melted). More importantly, ensure your heavy whipping cream was very cold when you whipped it, and you whipped it long enough to reach stiff peaks.
Q3: Can I skip the lemon juice?
A3: You can, but I strongly recommend keeping it! The acid in the lemon juice helps to slightly thicken and stabilize the no-bake filling, ensuring it sets up perfectly firm without needing gelatin.
Enjoy these little bites of heaven! Happy baking—or should I say, happy no-baking! Let me know in the comments how yours turned out!