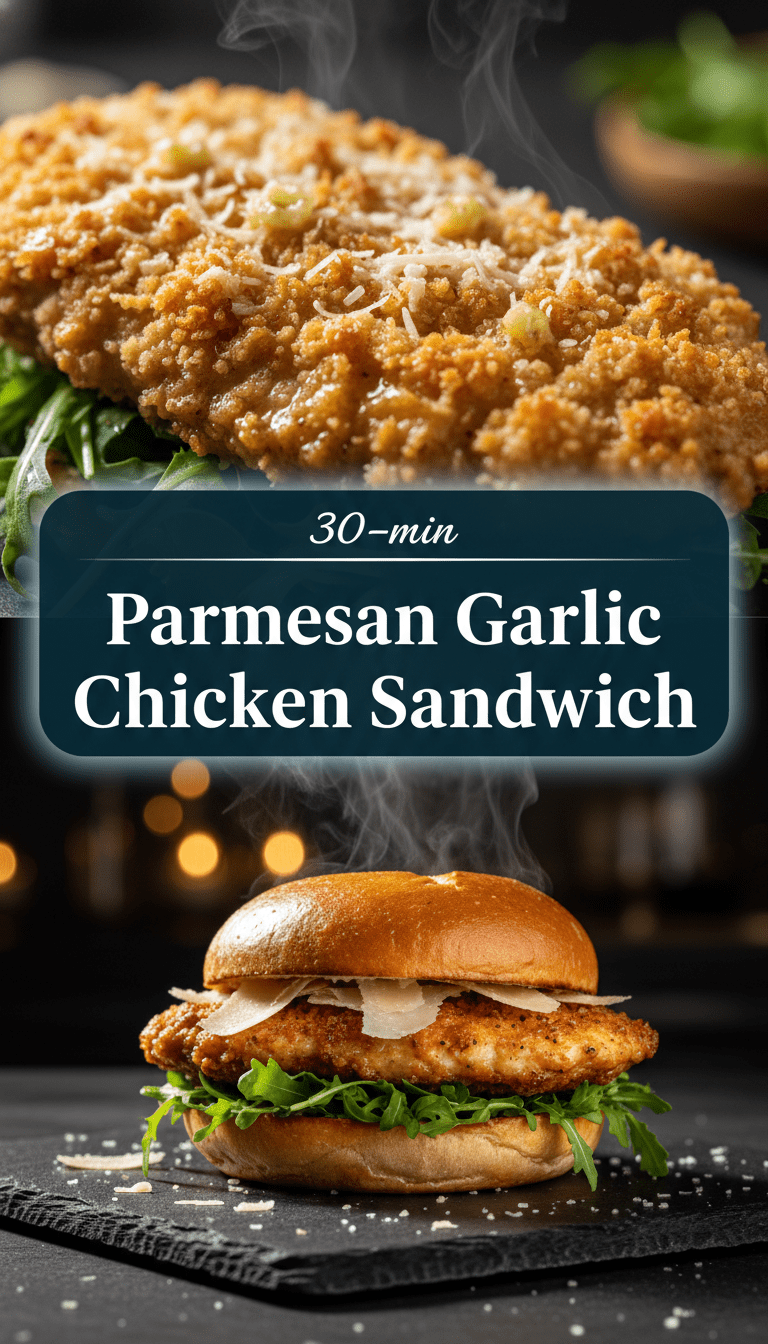
Hey food lovers! Are you ready for a sandwich that takes everything you love about crispy chicken, gooey cheese, and punchy garlic, and wraps it all up between two perfectly toasted buns? Because today, we are making what I firmly believe is the ultimate comfort food upgrade: the Parmesan Garlic Chicken Sandwich.
Forget those dry, boring chicken sandwiches you’ve had before. This one is juicy, packed with flavor, and honestly, smells incredible while it cooks. Trust me, your kitchen is about to smell like an Italian bistro! Let’s get cooking!
Quick Facts About This Amazing Sandwich
Here’s the rundown on how quickly you can get this flavor bomb on your plate:
Prep time: 15 minutes
Cooking time: 20 minutes
Total time: 35 minutes
Serving size: 4 sandwiches
Why You’ll Love This Recipe
This isn’t just another fried chicken sandwich; it’s a flavor experience!
- Maximum Flavor, Minimum Fuss: We are using simple ingredients to create an intensely savory, garlicky crust on the chicken.
- Incredibly Juicy: The secret to keeping the chicken breast tender while getting that crispy exterior is the quick brining/marinating step.
- Perfectly Balanced: The sharp Parmesan melts beautifully against the richness of the garlic butter, cutting through the creaminess of the mayo. It’s everything good in one bite!
Ingredients You’ll Need
Gather your goodies! This list is broken down by component.
For the Crispy Garlic Chicken:
- 4 boneless, skinless chicken breasts (about 6 oz each), pounded to an even ½-inch thickness
- 1 cup all-purpose flour
- 1 teaspoon salt
- ½ teaspoon black pepper
- ½ teaspoon paprika
- 2 large eggs, whisked
- 1 cup Panko breadcrumbs (they give the best crunch!)
- ½ cup grated Parmesan cheese (the finely shredded kind)
- Vegetable or canola oil, for frying (about 1 inch deep in your pan)
For the Garlic Butter & Topping:
- 4 tablespoons unsalted butter
- 4 cloves garlic, minced finely
- 1 teaspoon dried Italian herbs (like oregano and basil mix)
- 4 sturdy sandwich buns (brioche or Kaiser rolls work great)
- ½ cup mayonnaise
- 1 tablespoon lemon juice
- Optional: Fresh parsley, chopped, for garnish
- Optional: A few slices of provolone or mozzarella cheese per sandwich
Step-by-Step Instructions: Building the Best Sandwich Ever
Follow these steps closely, and you’ll have a restaurant-quality sandwich in no time!
H3: Step 1: Prepare and Dredge the Chicken
1. Set up your dredging station. In three shallow dishes:
* Dish 1: Mix the flour, salt, pepper, and paprika.
* Dish 2: Whisk the eggs.
* Dish 3: Mix the Panko breadcrumbs and the grated Parmesan cheese.
2. Take one pounded chicken breast. Lightly dredge it in the flour mixture, shaking off any excess.
3. Dip the floured chicken into the egg wash, letting any excess drip off.
4. Finally, press the chicken firmly into the Panko-Parmesan mix, ensuring both sides are completely coated. Repeat with the remaining chicken cutlets.
H3: Step 2: Fry the Chicken to Golden Perfection
1. Pour about 1 inch of oil into a large skillet and heat it over medium-high heat until it shimmers (around 350°F / 175°C).
2. Carefully place the breaded chicken cutlets into the hot oil, ensuring you don’t overcrowd the pan (work in batches if necessary).
3. Fry for about 4–5 minutes per side until deeply golden brown and cooked through (internal temperature should reach 165°F / 74°C).
4. Remove the chicken and place it on a wire rack lined with paper towels to drain excess oil.
H3: Step 3: Create the Garlic Butter Magic
1. While the chicken rests, wipe out most of the frying oil from the skillet (leave about 1 teaspoon). Reduce the heat to low.
2. Add the 4 tablespoons of butter to the pan. Let it melt completely.
3. Add the minced garlic and the Italian herbs. Sauté gently for about 1 minute until fragrant. Do not let the garlic burn!
4. Return the crispy chicken cutlets to the pan. Spoon the melted garlic butter mixture over the tops of the chicken several times. If using cheese slices, place them on top now and cover the pan briefly to help them melt quickly.
H3: Step 4: Toast the Buns and Assemble
1. Slice your buns open. Lightly toast the inside surfaces of the buns in a clean pan or under the broiler until golden brown.
2. In a small bowl, mix the mayonnaise and lemon juice together. Spread this zesty mayo generously on both the top and bottom toasted buns.
3. Place the cheesy, garlic-drenched chicken onto the bottom bun.
4. Top with fresh parsley, place the top bun on, and serve immediately!
Serving Suggestions
This sandwich is rich, so it pairs perfectly with something fresh and crunchy!
- Crispy Oven Fries or Sweet Potato Fries.
- A simple side salad tossed with a light vinaigrette to cut through the richness.
- Vinegar-based coleslaw.
Tips for Customization and Variations
Want to switch things up? Try these easy tweaks:
- Spice it Up: Add a pinch of cayenne pepper to the flour mixture for a kick, or use a spicy mayo instead of the lemon mayo.
- Air Fryer Method: If you prefer less oil, you can air fry the breaded cutlets at 380°F (195°C) for about 12–15 minutes, flipping halfway. Then, brush with the garlic butter mixture after cooking.
- Parmesan Crust Focus: For an extra-thick, savory crust, brush the fried chicken lightly with melted butter right out of the fryer, then sprinkle on an extra tablespoon of Parmesan cheese while it’s still piping hot.
Estimated Nutritional Information
Please note: This is a rough estimate based on standard portion sizes and methods. Actual values will vary based on specific ingredient brands and portion sizes.
Per Sandwich (Estimate): Calories: 650-750 | Protein: 45g | Fat: 35g | Carbohydrates: 40g
Frequently Asked Questions (FAQs)
Q1: Can I bake these instead of frying?
A: Yes, you absolutely can! To bake, spray the breaded chicken cutlets lightly with cooking spray and bake on a wire rack set inside a baking sheet at 400°F (200°C) for about 20–25 minutes, flipping once, until golden brown and cooked through. Then proceed with the garlic butter step!
Q2: Can I make the chicken ahead of time?
A: You can bread the chicken a few hours ahead of time and keep it covered in the refrigerator. However, for the best crispiness, it’s really best to fry it fresh right before serving.
Q3: What kind of Parmesan cheese should I use?
A: For the coating, finely grated, shelf-stable Parmesan works well because it blends easily with the breadcrumbs. For melting on top, a freshly grated block of Parmesan or mozzarella/provolone melts much creamier.