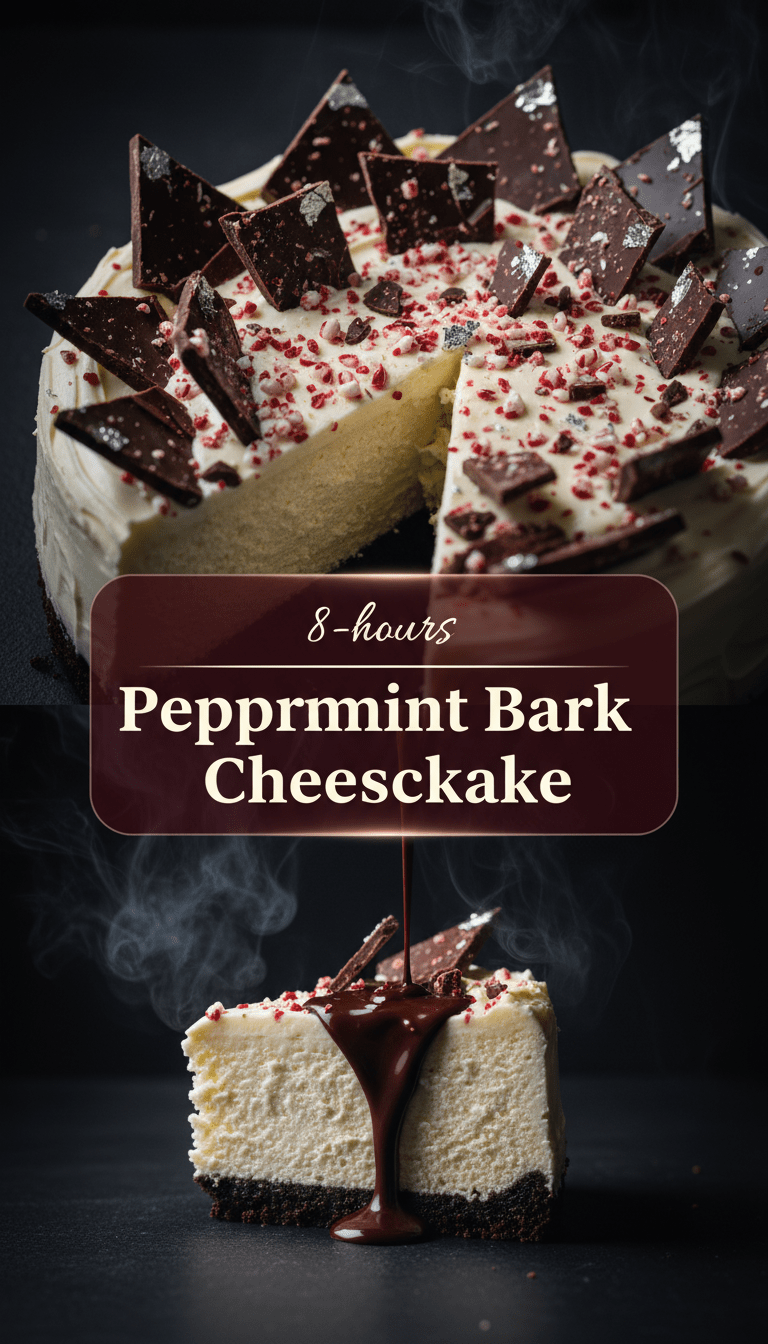
Hey everyone, and welcome back to the kitchen! If there’s one flavor combination that screams holiday magic, it has to be chocolate and peppermint. Seriously, is there anything better than that cool, crisp mint paired with rich, dark chocolate? Today, I’m taking that iconic flavor profile and giving it the royal treatment: a creamy, dreamy, utterly irresistible Peppermint Bark Cheesecake!
This isn’t just a dessert; it’s an experience. It’s crunchy, smooth, tangy, and packed with festive cheer. Don’t worry if you think cheesecakes are intimidating—I’ve broken this down step-by-step so even beginner bakers can pull off this stunning showstopper. Let’s dive in!
Quick Facts
- Prep time: 30 minutes
- Cooking time: 60-70 minutes
- Chill time: At least 6 hours (preferably overnight!)
- Total time: About 8 hours (mostly chilling)
- Serving size: 12 generous slices
Why You’ll Love This Recipe
This cheesecake manages to be decadent without feeling heavy. We’re using crushed candy canes in both the crust and the topping, giving you that amazing textural contrast—creamy filling meeting crunchy peppermint shards. Plus, it requires only a short bake time and looks incredibly impressive on any holiday dessert table. It truly tastes like Christmas in every bite!
Ingredients You’ll Need
This recipe is broken down into three main parts: the crust, the filling, and the topping.
For the Crunchy Peppermint Crust
- 1 ½ cups chocolate wafer cookie crumbs (like Oreos with the filling removed, or chocolate graham crackers)
- ¼ cup granulated sugar
- 6 tablespoons unsalted butter, melted
- ½ cup crushed peppermint candies or candy canes
For the Silky Cheesecake Filling
- 3 (8-ounce) packages full-fat cream cheese, softened to room temperature
- 1 ½ cups granulated sugar
- 1 teaspoon vanilla extract
- ½ teaspoon pure peppermint extract (start with less, taste, and add more if desired)
- 3 large eggs, room temperature
- ½ cup sour cream or full-fat Greek yogurt
For the Decadent Topping
- 8 ounces high-quality semi-sweet or dark chocolate, chopped
- 1 cup heavy cream
- 1 teaspoon peppermint extract (optional, for extra mint boost)
- ¾ cup crushed peppermint candies or candy canes (for sprinkling)
Step-by-Step Baking Magic
Preheat your oven to 325°F (160°C). Have a 9-inch springform pan ready.
Step 1: Preparing the Festive Crust
1. In a medium bowl, combine the chocolate cookie crumbs, ¼ cup sugar, and the 6 tablespoons of melted butter. Mix until everything is evenly moistened.
2. Stir in the first ½ cup of crushed peppermint.
3. Press this mixture firmly and evenly into the bottom of your springform pan. Make sure the edges are nice and compact.
4. Bake the crust for 8 minutes. Let it cool completely while you make the filling.
Step 2: Whipping Up the Creamy Center
1. In a large bowl, use an electric mixer (handheld or stand mixer) to beat the softened cream cheese on medium speed until it is completely smooth and lump-free—this is key! Scrape down the sides frequently.
2. Gradually add the 1 ½ cups of sugar and beat until just combined.
3. Mix in the vanilla extract and peppermint extract.
4. Beat in the sour cream or yogurt until smooth.
5. Add the eggs one at a time, mixing on low speed only until each egg is just incorporated. Do not overmix once the eggs are in, as this can lead to cracks!
Step 3: The Gentle Bake
1. Pour the filling mixture over the cooled crust in the springform pan.
2. Pro Tip: To prevent cracks, I highly recommend baking your cheesecake in a water bath (bain-marie). Wrap the outside bottom of your springform pan tightly in two layers of heavy-duty aluminum foil. Place the foil-wrapped pan inside a larger roasting pan. Carefully pour hot water into the roasting pan until it reaches about halfway up the sides of the springform pan.
3. Bake for 60 to 70 minutes. The edges should look set, but the very center (about 2 inches wide) should still have a slight wobble when gently shaken.
4. Turn off the oven, prop the oven door open slightly (using a wooden spoon works well), and let the cheesecake cool inside the oven for one hour. This slow cooling prevents drastic temperature changes that cause cracking.
5. Remove the cheesecake from the water bath (if used) and foil. Let it cool completely on a wire rack for another hour.
6. Cover and refrigerate for at least 6 hours, or preferably overnight.
Step 4: The Chocolate Peppermint Finish
1. Once the cheesecake is fully chilled, prepare the ganache topping. Place the chopped chocolate in a heatproof bowl.
2. Heat the heavy cream in a small saucepan until it just starts to simmer around the edges.
3. Pour the hot cream over the chopped chocolate. Let it sit undisturbed for 5 minutes.
4. Whisk gently until the mixture is smooth, glossy, and completely melted. Stir in the optional ½ teaspoon of peppermint extract if using.
5. Let the ganache cool slightly (about 10 minutes) until it thickens to a spreadable consistency, but is still pourable.
6. Pour the ganache over the top of the chilled cheesecake, spreading it evenly with an offset spatula.
7. Immediately sprinkle the remaining ¾ cup of crushed peppermint candy over the top before the chocolate sets.
8. Chill for at least 30 minutes more to allow the topping to firm up.
Serving Suggestions
When ready to serve, run a thin knife dipped in hot water around the edge of the cheesecake before releasing the springform sides. Slice with a warm, clean knife for perfect pieces!
Serve slices plain to let the intense peppermint flavor shine, or accompany them with:
- A dollop of fresh, unsweetened whipped cream.
- A light drizzle of chocolate syrup.
- A dusting of cocoa powder around the plate.
Tips for Customization & Variations
- No Water Bath? If you skip the water bath, watch the cheesecake very carefully. If you notice the edges browning too fast, loosely tent the top with foil.
- Crust Swap: If you can’t find chocolate wafers, graham crackers work, but consider adding 1 tablespoon of cocoa powder to the mix for that dark chocolate color.
- White Chocolate Swirl: For an extra visual treat, reserve about 1 cup of the plain cheesecake batter before adding the peppermint extract. Swirl dollops of the white batter over the top of the mint batter just before baking, then top with crushed candy canes.
Estimated Nutritional Information
Please note: This is a very rough estimate per slice (1/12th of the cake) and varies greatly based on ingredients used (especially chocolate quality and fat content).
Calories: 450 – 550
Fat: 30g – 35g
Carbohydrates: 45g – 55g
Protein: 7g – 9g
Frequently Asked Questions (FAQs)
Q: Can I make this cheesecake ahead of time?
A: Absolutely! Cheesecake is best made a day ahead. Once topped, it needs to chill for at least 6 hours, but chilling overnight allows the flavors to fully meld. Store it covered tightly in the refrigerator.
Q: Why did my cheesecake crack?
A: Cracks are usually caused by one of three things: over-mixing the eggs (introducing too much air), baking at too high a temperature, or cooling too rapidly. The water bath and gradual cooling process in the oven should solve this!
Q: Can I use artificial peppermint extract?
A: I highly recommend using pure peppermint extract. Artificial extract can sometimes taste too sharp or medicinal. Start with less of the pure extract, taste the batter (before adding eggs!), and adjust slowly.
Q: How do I store leftovers?
A: Keep the leftovers tightly covered in the refrigerator for up to 4 days. You can also freeze cheesecake slices very successfully! Wrap individual slices tightly in plastic wrap and then foil before freezing for up to 2 months. Thaw overnight in the fridge.
Enjoy every incredible, festive bite of this Peppermint Bark Cheesecake! Happy baking!
