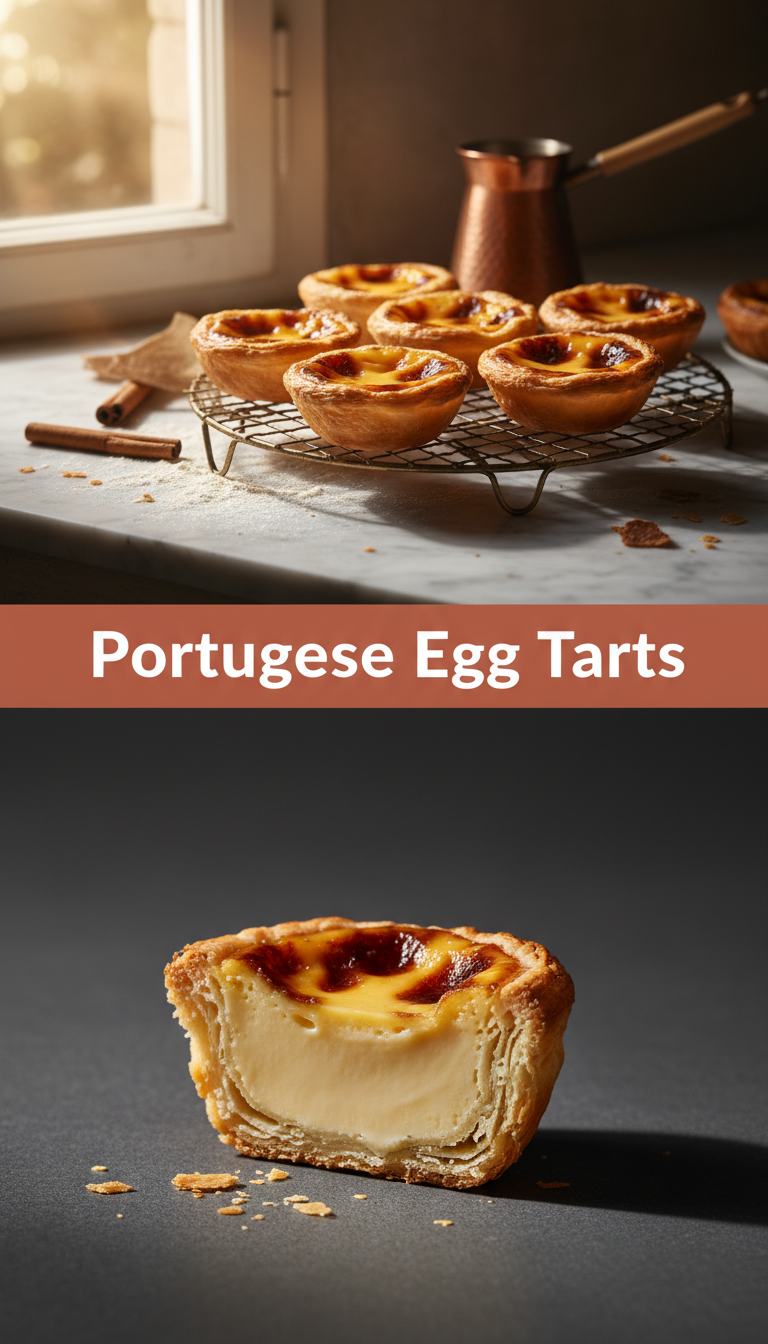
Hello, fellow baking enthusiasts! If you’ve ever dreamt of biting into a crispy, buttery shell that cradles a warm, creamy, caramelized custard, then you’ve arrived at the right place. Today, we’re tackling the legendary Pastéis de Nata, or as most of us know them, Portuguese Egg Tarts.
These aren’t just any egg tarts; they have that signature blistered, deeply caramelized top that makes them utterly irresistible. Don’t let the fancy name intimidate you. I’ve broken down the process so that even if you’re new to puff pastry, you can achieve bakery-quality results right in your own kitchen. Get ready for some serious kitchen magic!
Quick Facts
Here’s a snapshot of what you’re looking at for this delicious adventure:
Prep time: 30 minutes (Plus chilling time if making dough from scratch, but we’re using store-bought for simplicity!)
Cooking time: 12–15 minutes
Total time: Approximately 45 minutes
Serving size: Makes 12 standard-sized tarts
Why You’ll Love This Recipe
This recipe is designed for maximum flavor with minimum stress!
1. The Texture Dream: You get that perfect contrast—flaky, shatteringly crisp pastry against a silken, sweet, and slightly tangy custard filling.
2. High Heat Happiness: We use a super hot oven to achieve those beautiful, signature leopard spots on top.
3. Simple Ingredients: We’re streamlining the process by using high-quality store-bought puff pastry, saving hours of lamination time!
Ingredients You’ll Need
This recipe is split into two main parts: the pastry and the filling.
For the Pastry (The Quick Way!)
- 1 sheet (about 14 oz) frozen puff pastry, thawed according to package directions.
For the Custard Filling
- 1 cup heavy cream
- 1/2 cup whole milk
- 1/2 cup granulated sugar
- 1 cinnamon stick
- 1 strip of lemon zest (about 2 inches long, avoid the bitter white pith)
- 1/4 cup water
- 2 tablespoons all-purpose flour
- 6 large egg yolks (save those whites for meringues!)
Step-by-Step Instructions: Baking Bliss
Follow these steps closely, especially regarding the syrup temperature, and you’ll be golden!
H3: Preparing the Pastry Shells
1. Preheat and Prep: Preheat your oven to the highest temperature it will safely go—usually 500°F (260°C). Place a standard 12-cup muffin tin on a baking sheet.
2. Roll the Dough: Gently unfold your thawed puff pastry sheet onto a lightly floured surface. Roll it up tightly into a log, starting from one of the short ends. Try to make the log as compact as possible.
3. Slice the Log: Using a sharp knife, slice the log into 12 equal rounds (about 3/4 inch thick).
4. Press into Tins: Take one pastry round and place it cut-side up in the bottom of a muffin cup. Using your thumb dipped in a little water (this helps prevent sticking), press the dough evenly down and up the sides of the tin. You want the pastry to be thinner on the bottom and thicker around the edges. Repeat for all 12 cups. Place the muffin tin in the fridge while you make the custard.
H3: Making the Silky Custard
1. Create the Syrup Base: In a small saucepan, combine the sugar, water, cinnamon stick, and lemon zest. Heat over medium heat, stirring just until the sugar dissolves. Stop stirring once it boils, and let it bubble vigorously until it reaches 220°F (105°C) on a candy thermometer. Remove from heat and let the spices infuse while you move to the next step.
2. Make the Flour Slurry: In a separate small bowl, whisk together the flour with the milk until completely smooth—no lumps allowed!
3. Heat the Cream: In another small saucepan, gently heat the heavy cream until it just begins to simmer around the edges.
4. Combine and Thicken: Slowly whisk the flour/milk mixture into the warm cream. Continue whisking constantly over medium-low heat until the mixture thickens slightly, resembling thin gravy (about 2 minutes). Remove from the heat.
5. Temper the Yolks: Strain the warm sugar syrup into the cream mixture to remove the cinnamon stick and zest. In a separate bowl, lightly whisk your egg yolks. While whisking the yolks constantly, slowly pour about 1/2 cup of the warm cream mixture into the yolks. This is called tempering, and it stops the yolks from scrambling!
6. Final Mix: Pour the tempered yolk mixture back into the remaining cream base. Whisk gently until everything is smooth and uniform.
H3: Baking to Perfection
1. Fill the Shells: Retrieve your chilled pastry-lined tins. Pour the custard mixture into each shell, filling them about 90% full.
2. Bake Hot and Fast: Immediately place the baking sheet into the preheated 500°F (260°C) oven. Bake for 12 to 15 minutes.
3. Watch for Color: The tarts are done when the pastry is deep golden brown and the custard is set with those signature dark brown/black caramelized spots on top.
4. Cool: Carefully remove the tarts from the oven. Let them cool in the muffin tin for about 5 minutes before gently removing them onto a wire rack to cool completely (or just long enough to burn your tongue when you take the first bite!).
Serving Suggestions
The best way to eat a Portuguese Egg Tart is warm, ideally dusted lightly with cinnamon or a tiny sprinkle of powdered sugar right before serving. They pair perfectly with a strong espresso or a glass of cold milk.
Tips for Customization & Variations
- The Zest Swap: Don’t like lemon? Try using a thin strip of orange zest instead for a slightly sweeter aromatic note.
- Flavor Infusion: For a richer flavor, infuse the cream and milk with a tiny bit of vanilla bean paste instead of using cinnamon and lemon.
- Perfect Pastry: If you really want that authentic laminated texture, use all-butter puff pastry for the flakiest result.
Nutritional Information (Estimated per Tart)
Please note: This is an estimation based on standard ingredients and a 12-tart yield. Actual values will vary.
Calories: 220-250 kcal
Fat: 14g
Carbohydrates: 20g
Protein: 4g
Frequently Asked Questions (FAQs)
Q1: Why are my egg tarts not spotting on top?
A: This is almost always due to oven temperature! Portuguese Egg Tarts need extreme heat (500°F/260°C or higher) to caramelize the sugars quickly before the custard overcooks. If your oven runs cool, try placing a pizza stone on the bottom rack to retain intense heat underneath the tarts.
Q2: Can I make the custard filling ahead of time?
A: Yes! You can prepare the custard base (Steps 1 through 6 of the filling process) up to 2 days in advance. Store it covered in the refrigerator. Whisk it thoroughly again before pouring it into the pastry shells.
Q3: My pastry shrunk when baking. What went wrong?
A: This usually means your pastry wasn’t cold enough when it hit the hot oven, or you didn’t press the dough firmly enough against the sides of the tin. Make sure your assembled tins go straight from the fridge to the 500°F oven.
Enjoy these incredible tarts! Once you nail this recipe, you’ll never look at a store-bought pastry the same way again. Happy baking!