Oh, hello there, fellow food lover! Are you tired of those perfectly round, slightly bland English muffins from the supermarket? Do you dream of that signature craggy interior, perfect for trapping melted butter and jam? Well, you’ve come to the right place! Today, we are diving deep into the art of making truly authentic, delightful homemade English Muffins. Forget the toaster—we’re cooking these beauties on the griddle!
Trust me, once you master this recipe, you’ll never look back. They are surprisingly simple, requiring just a few pantry staples and a little bit of patience while they proof. Let’s get baking!
Quick Facts
Here’s a snapshot of what you need to know before we start mixing:
Prep time: 25 minutes
Resting/Proofing time: 1.5 – 2 hours
Cooking time: 15 – 20 minutes
Total time: Approximately 2 hours
Serving size: Makes 8 medium muffins
Why You’ll Love This Recipe
There’s a magic that happens when you cook these on a skillet instead of baking them in an oven. You get that distinctive, slightly browned exterior and an incredibly soft, airy crumb inside—the hallmark of a perfect English Muffin. Plus, the smell filling your kitchen as they cook? Pure comfort! They are fantastic for weekend brunch and freeze beautifully for quick weekday breakfasts.
Ingredients You’ll Need
Gather these simple ingredients, and we’re ready to roll!
- 2 cups (240g) All-Purpose Flour, plus extra for dusting
- 1 tablespoon Granulated Sugar
- 1 teaspoon Salt
- 1 teaspoon Instant Dry Yeast
- 3/4 cup Warm Milk (about 105°F to 115°F)
- 2 tablespoons Unsalted Butter, melted, plus more for the griddle
- 1 teaspoon Baking Powder (this is the secret to extra lift!)
- Cornmeal or semolina, for dusting the baking sheet/surface
Step-by-Step Instructions: Creating the Craggy Wonders
We’ll break this down into mixing, resting, shaping, and cooking. Easy peasy!
Step 1: Activating the Dough
1. In a large bowl, whisk together the flour, sugar, salt, and instant yeast. Make sure they are well combined.
2. In a separate small bowl or measuring cup, gently warm your milk. It should feel warm to the touch, not hot (if it’s too hot, it will kill the yeast!). Stir in the melted butter.
3. Pour the wet ingredients into the dry ingredients. Use a wooden spoon or a sturdy spatula to mix until a shaggy, slightly sticky dough forms. Don’t overmix!
Step 2: The First Rise (Proofing)
1. Lightly grease a clean bowl with oil. Place the shaggy dough inside, turning it once to coat.
2. Cover the bowl tightly with plastic wrap or a clean kitchen towel.
3. Place the bowl in a warm spot and let it rise until it has nearly doubled in size. This usually takes between 60 to 90 minutes, depending on the warmth of your kitchen.
Step 3: Shaping Your Muffins
1. Once risen, gently punch down the dough to release the air. Turn the dough out onto a generously floured surface (use some of that extra flour).
2. Sprinkle the top of the dough with the baking powder and gently fold it into the dough a couple of times. This helps distribute the leavening agent evenly.
3. Pat the dough out until it is about 1/2 to 3/4 inch thick.
4. Using a 3-inch round biscuit cutter (or the rim of a glass), cut out your muffins. Do not twist the cutter—this seals the edges and prevents those beautiful nooks and crannies from forming!
5. Place the cut-out rounds on a baking sheet liberally dusted with cornmeal. Gather the scraps, gently re-pat, and cut out any remaining muffins.
Step 4: The Second Rest
1. Cover the cornmeal-dusted rounds loosely with a clean cloth. Let them rest again in a warm place for another 30 minutes. They will puff up slightly.
Step 5: Griddle Time!
1. Heat a dry, heavy-bottomed skillet, cast iron pan, or griddle over medium-low heat. This low and slow cooking is crucial for cooking the inside without burning the outside.
2. Once hot, carefully place the muffins onto the dry griddle, leaving space between them.
3. Cook for about 5 to 7 minutes per side. You are looking for a beautiful golden brown color. If they brown too quickly, turn your heat down immediately!
4. Once cooked, transfer the muffins to a wire rack to cool completely.
Serving Suggestions
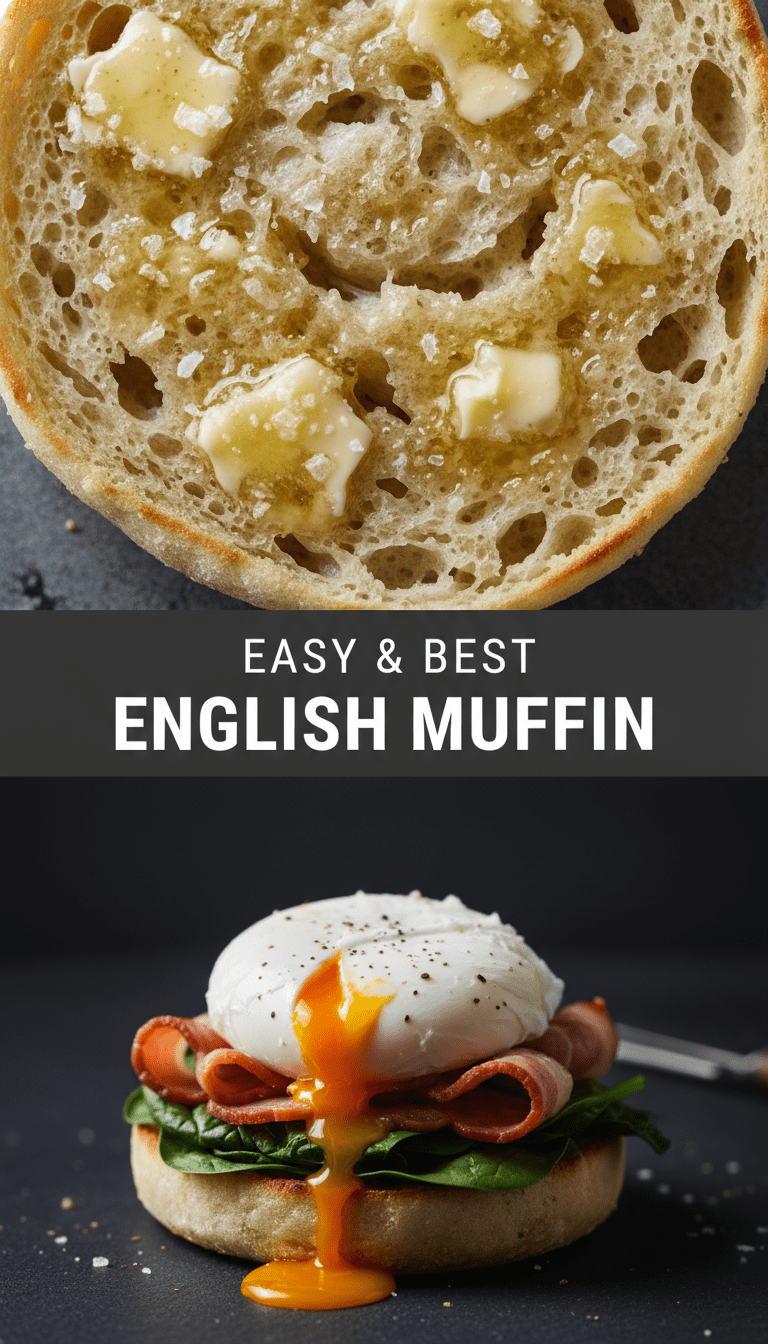
The best part! Once cooled, split your English muffins horizontally using a fork, not a knife. This method preserves those glorious nooks and crannies for maximum butter absorption.
- Classic: Toasted generously with melted butter and strawberry jam.
- Breakfast Sandwich: Poached eggs, melted cheddar, and a slice of crispy bacon.
- Sweet Treat: Lightly toasted and topped with cream cheese and sliced bananas.
Tips for Customization and Variations
Want to switch things up? Here are a few ways to personalize your muffins:
1. Whole Wheat Twist: Substitute up to 1/2 cup of the all-purpose flour with whole wheat flour for a nuttier flavor.
2. Herb & Cheese: Before resting (Step 3), gently knead in 1/4 cup of finely grated sharp cheddar cheese and a teaspoon of dried chives or rosemary.
3. Gluten-Free: This recipe is trickier to convert perfectly, but if you use a good quality 1:1 gluten-free blend that contains xanthan gum, it can work! You may need slightly more liquid.
Nutritional Information (Estimated Per Muffin)
Please note these are rough estimates and will vary based on exact ingredient measurements:
Calories: 150 – 170
Fat: 3g
Carbohydrates: 28g
Protein: 5g
Frequently Asked Questions (FAQs)
Q: Why should I use a fork to split them instead of a knife?
A: A knife slices through the crumb, creating a flat surface. Using a fork gently pries the muffin apart along its natural layers, creating those iconic holes and crags that are perfect for holding toppings.
Q: Can I bake these in the oven instead of using a griddle?
A: Yes, you can! Preheat your oven to 375°F (190°C). Place the shaped muffins on a cornmeal-dusted baking sheet and bake for about 12-15 minutes, flipping halfway through. However, the texture will be more like a scone or biscuit, losing that classic griddle-cooked flavor.
Q: My dough didn’t rise well. What went wrong?
A: The most common culprit is the temperature of the milk. If it was too hot, it killed the yeast. If your kitchen is very cold, the yeast might just be sluggish. Try placing the dough in the oven with the light on (but the oven off!) for a warm environment.
Happy baking, everyone! Enjoy those perfectly toasted, craggy centers!