Hello, sweet friends, and welcome back to my kitchen! Is there anything that screams “cozy” louder than a steaming mug of hot chocolate? I think not! But what if I told you we could take that comforting flavor and transform it into the most ridiculously moist, chocolatey cake you’ve ever tasted?
Today, we are diving spoon-first into my Hot Cocoa Poke Cake. This isn’t just any cake; it’s a chocolate lover’s dream, infused with a rich chocolate pudding filling that seeps into every nook and cranny. Get ready for the easiest, most decadent dessert you’ll make all season!
Quick Facts About This Divine Dessert
Here’s a quick snapshot so you can plan your baking adventure:
Prep time: 20 minutes
Cooking time: 30-35 minutes
Cooling/Setting time: 2 hours (minimum)
Total time: Approximately 3 hours (mostly inactive)
Serving size: 12 generous slices
Why You’ll Love This Recipe
This Hot Cocoa Poke Cake is pure magic!
1. Ultimate Moisture: The secret sauce—or should I say, the secret pudding—makes this cake impossibly moist. It never dries out!
2. Simple Ingredients: We are starting with a boxed mix, keeping things easy, but the additions make it taste gourmet.
3. Perfect for Parties: It looks stunning once sliced, revealing all those delicious chocolate “veins.”
4. Kid-Friendly (and Adult-Approved!): Everyone loves chocolate, and everyone loves marshmallows, right? This hits all the right nostalgia buttons.
Gathering Your Goodies: The Ingredients List
We’re dividing the ingredients into three parts: the cake, the poke filling, and the topping.
For the Chocolate Cake Base:
- One box (about 15.25 oz) dark chocolate or devil’s food cake mix
- Ingredients required on the box for the cake (usually eggs, oil, and water)
For the Decadent Poke Filling:
- One package (3.9 oz) instant chocolate pudding mix (the regular size)
- 1 1/2 cups cold milk (whole milk works best for richness)
- 1 cup hot water or hot brewed coffee (for deeper flavor!)
- One bag (10 oz) mini marshmallows
For the Whipped Topping:
- One large tub (12 oz) frozen whipped topping (like Cool Whip), thawed, OR
- 2 cups heavy whipping cream, 1/2 cup powdered sugar, and 1 teaspoon vanilla extract (whipped yourself)
- Chocolate shavings or extra mini marshmallows for garnish
Step-by-Step Magic: Making Your Cake
Don’t be intimidated by the steps—they are so straightforward!
Step 1: Bake the Base
Preheat your oven to the temperature specified on your cake mix box (usually 350°F or 325°F). Grease and flour a 9×13 inch baking dish.
Prepare the cake batter according to the box instructions and pour it into your prepared dish. Bake until a toothpick inserted in the center comes out clean.
Let the cake cool in the pan on a wire rack for about 15 to 20 minutes. It needs to be warm, but not piping hot, for the next step.
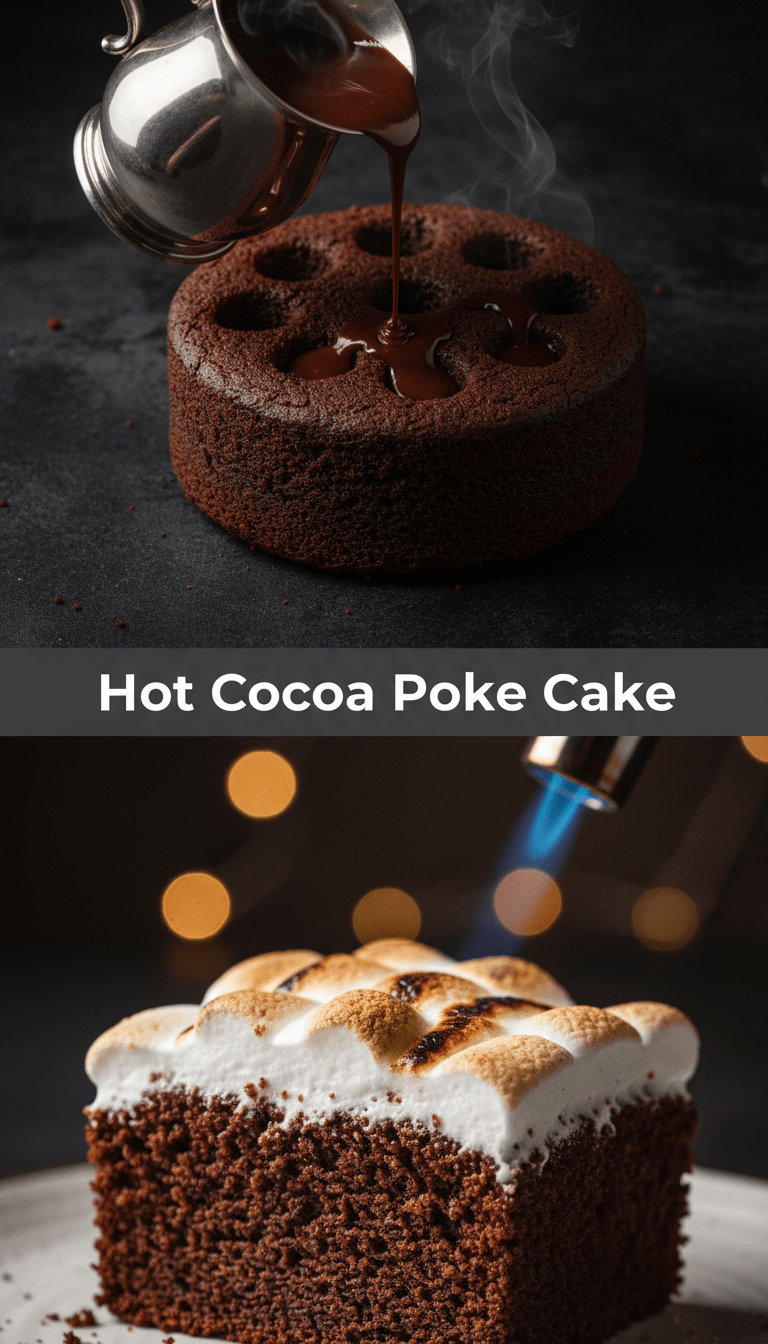
Step 2: The “Poke” Phenomenon
This is the fun part! Take a wooden skewer, the handle of a wooden spoon, or a large fork, and start poking holes all over the warm cake. Poke every inch or so, going all the way down to the bottom of the pan. Don’t be shy—we want lots of holes!
Step 3: Creating the Pudding Infusion
While the cake is still warm, prepare the filling. In a medium bowl, whisk together the instant chocolate pudding mix, cold milk, and hot water/coffee. Whisk vigorously for about two minutes until it starts to thicken slightly.
Immediately pour the slightly runny pudding mixture evenly over the entire surface of the poked cake, making sure some of the mixture drips down into the holes.
Step 4: Marshmallow Melt Down
Sprinkle the entire bag of mini marshmallows evenly over the pudding-covered cake.
Place the cake back into the warm oven (you can turn the oven off, or keep it on very low heat—around 200°F—if you prefer). Bake for about 5 to 8 minutes, just until the marshmallows are puffy and lightly melted. Watch them closely so they don’t burn!
Step 5: Chill and Frost
Remove the cake from the oven and let it cool completely to room temperature. Then, cover it loosely and refrigerate for at least 2 hours, or until thoroughly chilled. The chilling allows the pudding to fully set and soak into the cake.
Once chilled, spread the thawed whipped topping evenly over the top. Garnish with chocolate shavings or extra marshmallows. Slice and enjoy!
How to Serve Up Perfection
This cake is rich, so a small slice goes a long way!
Serve it chilled directly from the refrigerator. It pairs beautifully with a dollop of extra whipped cream on the side, or maybe even a sprinkle of crushed peppermint candies if you’re feeling festive!
Tips for Customization & Variations
Want to make this recipe your own? Try these tweaks:
- Mocha Magic: Use brewed coffee instead of water in the pudding mix for a stronger coffee flavor.
- Peanut Butter Twist: Use a peanut butter instant pudding mix instead of chocolate, or swirl some peanut butter into the chocolate pudding before pouring.
- Minty Fresh: Add a teaspoon of peppermint extract to the whipped topping for a Peppermint Hot Cocoa Cake!
- Boozy Kick (For Adults Only!): Stir a couple of tablespoons of Irish Cream liqueur into the cold milk before whisking the pudding.
Estimated Nutritional Information
Please note: This is a very rough estimate and will vary based on the specific brands and ingredients you use.
Estimated per slice (1/12th of the cake): Calories 350-450, Total Fat 15-20g, Carbohydrates 50-60g, Protein 4g. This is definitely a treat, not a daily staple!
Frequently Asked Questions (FAQs)
Q1: Can I make this cake ahead of time?
A: Yes! You can bake the cake and pour the pudding over it a day ahead. Wait to apply the whipped topping until just before serving for the freshest look.
Q2: Can I use homemade pudding instead of instant?
A: You certainly can, but homemade cooked pudding needs to be cooled almost completely before pouring it over the cake, or it won’t seep into the holes as well. Instant pudding works best here because it thickens as it sets inside the cake.
Q3: My marshmallows burned in the oven! What did I do wrong?
A: Keep a very close eye on them! You only need the residual heat to melt them slightly. If your oven runs hot, turn it off completely after baking the cake and just let the residual warmth melt the marshmallows for 5-7 minutes.
Happy baking, everyone! Let me know in the comments how your Hot Cocoa Poke Cake turned out!