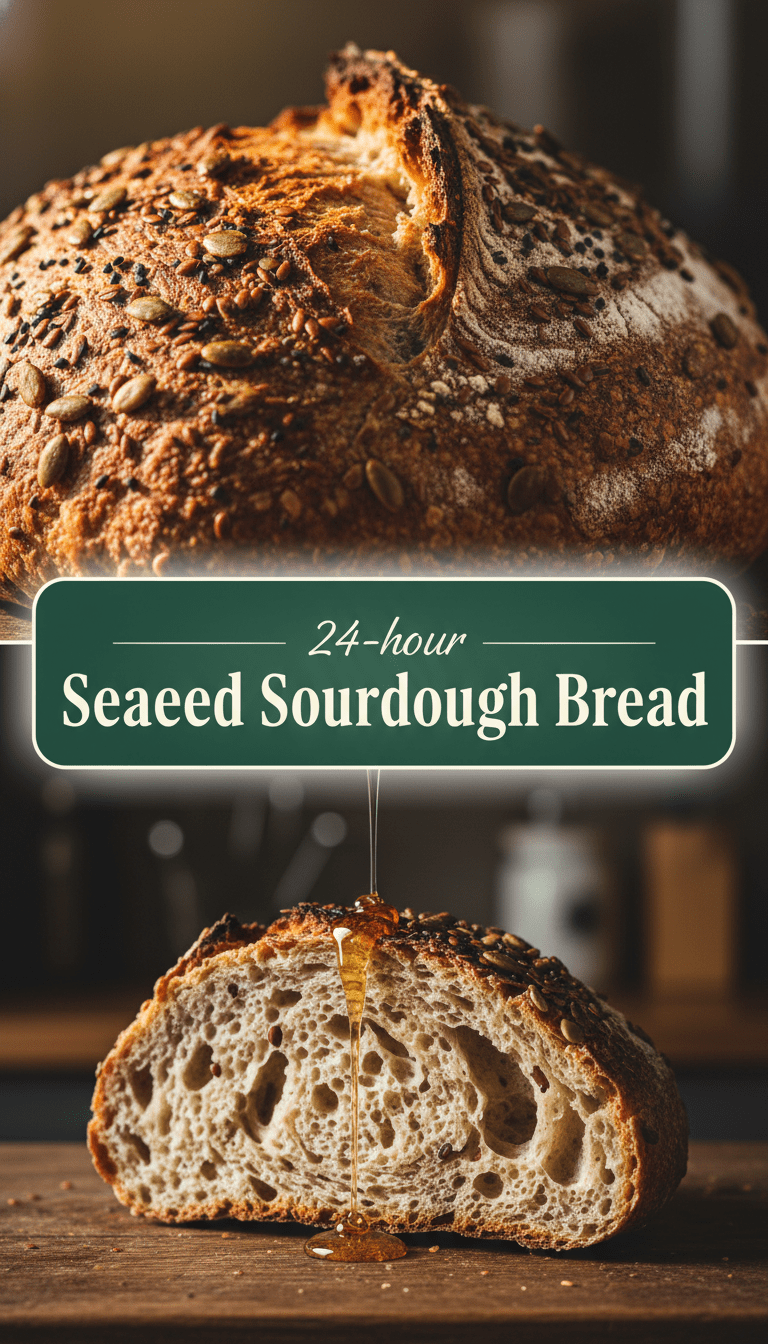
Hey everyone, and welcome back to the kitchen! If there’s one thing that truly smells like home, it’s freshly baked sourdough. And today, we’re taking that classic tang and texture up a notch by loading it with a glorious medley of seeds. Forget those plain loaves; this Seeded Sourdough Bread is crunchy, nutty, incredibly satisfying, and surprisingly easy to master once you know the ropes.
I know sourdough can look intimidating, but trust me, this recipe is designed for real home bakers. We’re going to walk through every step together. Get ready for the best crust and crumb you’ve ever made!
Quick Facts
Here’s a snapshot of what you’re looking at for this baking adventure:
Prep time: 30 minutes (active mixing/shaping)
Resting/Proofing time: 12-18 hours (mostly hands-off!)
Baking time: 45 minutes
Total time: About 19 hours (mostly chilling!)
Serving size: 1 large loaf (about 12-14 slices)
Why You’ll Love This Recipe
Why bother with this seeded beauty? Because it hits all the right notes!
- Amazing Texture: You get that signature open, airy sourdough crumb combined with a satisfying crunch from the seeds.
- Nutrient Boost: Adding flax, sesame, sunflower, and pumpkin seeds packs this loaf with healthy fats and fiber.
- Incredible Aroma: Seriously, your house will smell like a high-end bakery.
- Perfect for Dipping: The hearty crust stands up beautifully to soups, stews, and dips.
What You’ll Need: The Ingredients List
For this recipe, we’ll divide the ingredients into the main dough and the seed mix. Make sure your sourdough starter is active and bubbly before you begin!
For the Seed Soaker
- 1/4 cup Flax seeds
- 1/4 cup Sunflower seeds
- 1/4 cup Pumpkin seeds (pepitas)
- 1/4 cup Sesame seeds
- 1/2 cup Hot water (just off the boil)
For the Bread Dough
- 100g Active Sourdough Starter (fed 4-12 hours prior)
- 375g Warm Water (around 85°F/30°C)
- 500g Strong Bread Flour (high protein works best)
- 10g Fine Sea Salt
- All of the prepared Seed Soaker (cooled)
Let’s Get Baking! Step-by-Step Instructions
This process involves a few key stages: mixing, bulk fermentation (where the magic happens!), shaping, and the final proof.
Step 1: Prepare the Seeds (The Night Before or Morning Of)
In a small bowl, mix all your seeds together. Pour the hot water over the seeds and stir well. Let this sit on the counter until it cools completely to room temperature—about 30 minutes. They will turn into a lovely, thick gel. This prevents the seeds from sucking too much moisture out of your dough later.
Step 2: The Autolyse and Mixing
1. In a large mixing bowl, combine the flour and warm water. Mix just until no dry flour remains. Cover the bowl and let it rest for 30 to 60 minutes. This is called the autolyse and helps the flour absorb the water fully.
2. After the rest, add the active starter and salt to the shaggy dough. Use wet hands to pinch and squeeze the dough until everything is incorporated (about 3-5 minutes).
3. Now, gently fold in your entire cooled seed soaker. It will look messy at first, but keep folding until the seeds are evenly distributed.
Step 3: Bulk Fermentation & Building Strength
This phase usually takes 3 to 5 hours, depending on your kitchen temperature.
1. Stretch and Folds: Over the first 2 hours of bulk fermentation, perform four sets of stretch and folds, spaced 30 minutes apart. To do this, wet your hands, gently lift one side of the dough, stretch it upwards, and fold it over the top. Rotate the bowl 90 degrees and repeat until you’ve folded all four sides.
2. After the fourth set, let the dough rest undisturbed until it has visibly increased in volume (about 30-50%) and looks airy.
Step 4: Pre-Shaping and Final Shaping
1. Gently scrape the dough out onto a lightly floured surface. Gently shape it into a loose round (a preshape). Let it rest for 20 minutes, covered (this is the bench rest).
2. Final Shape: Flip the dough over. Shape it tightly into your desired form (a boule or an oval/batard). You want to create good surface tension without degassing too much.
3. Place the shaped loaf, seam-side up, into a well-floured banneton (proofing basket). If you don’t have one, use a bowl lined with a heavily floured linen or cotton tea towel.
Step 5: Cold Proofing (The Flavor Builder!)
Cover the banneton tightly with plastic wrap or place it inside a plastic bag. Transfer it to the refrigerator for a long, slow proof—ideally 12 to 18 hours. This develops that beautiful sourdough tang!
Step 6: Baking Day!
1. Preheat your oven to 500°F (260°C) with your Dutch oven (or baking stone) inside for at least 45 minutes. High heat is key!
2. Carefully flip your cold dough out of the banneton onto a piece of parchment paper.
3. Score the top deeply with a sharp blade (lame). This controls where the bread expands.
4. Carefully lower the dough (using the parchment paper as a sling) into the hot Dutch oven.
5. Bake covered for 20 minutes at 500°F (260°C).
6. Reduce the heat to 450°F (230°C), remove the lid, and bake for another 25 to 30 minutes, until the crust is deep golden brown.
7. Cool completely on a wire rack for at least 2 hours before slicing. Resist the urge to cut early—it ruins the crumb structure!
Serving Suggestions
This bread is robust enough to handle anything!
- Toast it thick and slather with salted butter and a drizzle of honey.
- Use it as the base for hearty avocado toast topped with everything bagel seasoning.
- It makes phenomenal grilled cheese sandwiches.
- Serve alongside a big bowl of creamy tomato soup or French Onion Soup.
Tips for Customization and Variations
Want to switch things up? Here are a few easy tweaks:
- Different Seeds: Feel free to swap out the suggested seeds for things like poppy seeds, nigella seeds, or hemp hearts. Just maintain the 1-cup total volume.
- Soaker Swap: Instead of just hot water, use strong, cooled black coffee or tea for the seed soaker for a deeper background flavor.
- Incorporate Whole Wheat: Replace up to 100g of the bread flour with whole wheat flour for an earthier taste.
Estimated Nutritional Information
Please note: This is a rough estimate for one slice (assuming 14 slices per loaf) and will vary based on your exact ingredients and flour type.
Per Slice: Approximately 160-190 calories, 4g protein, 28g carbohydrates, 3g fiber. High in healthy fats from the seeds.
Frequently Asked Questions (FAQs)
Q: My dough didn’t rise much during the bulk fermentation. What went wrong?
A: This usually means your starter wasn’t fully active or your kitchen is too cold. Sourdough thrives when it’s warm (ideally 75-80°F). If it’s cold, just give it more time—sometimes it takes 6 or 7 hours!
Q: Can I skip the cold proof in the fridge?
A: You can, but I highly discourage it! The cold proof is crucial for developing the sour flavor and making the dough firm enough to score cleanly. If you must bake sooner, proof at room temperature for 1-2 hours after shaping, but the flavor won’t be as complex.
Q: What is the best way to store leftover seeded sourdough?
A: Keep it whole on the counter, cut-side down, wrapped loosely in a clean tea towel for 2-3 days. For longer storage, slice it and freeze it! Toast straight from the freezer whenever you need a slice.
Happy Baking! Let me know in the comments below how your beautiful, crunchy loaf turned out!
