Hey everyone, and welcome back to my kitchen! If you’re anything like me, you believe that the best parties always have the best snacks. And what’s a better snack than a classic 7 Layer Dip? It’s the ultimate crowd-pleaser, but let’s be honest—scooping from one big tray can sometimes get a little messy, especially when everyone is trying to get that perfect ratio of guacamole to sour cream.
That’s why today, I’m sharing my solution: 7 Layer Dip Cups! These individual servings make serving a breeze, keep everything neat, and let everyone customize their perfect bite. Trust me, these will be the first things gone at your next gathering.
Quick Facts
Prep time: 25 minutes
Cooking time: 0 minutes (Unless you count heating up the beans!)
Total time: 25 minutes
Serving size: Makes 8 individual cups
Why You’ll Love This Recipe
This recipe takes everything you adore about traditional 7 Layer Dip and makes it portable and personal!
- No More Soggy Chips: Since everything is layered perfectly in a cup, your chips stay crisp right up until you dunk them.
- Perfect Portions: Everyone gets a clean scoop with all seven layers represented.
- Make-Ahead Friendly: You can assemble these hours before your event.
- Visually Stunning: Seeing those distinct layers stacked up in clear cups is just so satisfying!
Ingredients You’ll Need
We are sticking to the classics here, but feel free to play with the order if you want! I like to use small, clear plastic or glass tumblers for the best visual effect.
- 1 can (16 oz) refried beans (vegetarian or traditional)
- 1 packet (1 oz) taco seasoning mix
- 1 cup sour cream (full fat works best for texture)
- 1 teaspoon lime juice
- 1 medium avocado, mashed (or 1 cup guacamole)
- 1 cup salsa (medium heat, well-drained)
- 1 cup shredded cheddar or Mexican blend cheese
- 1/2 cup black olives, sliced
- Optional Toppings: Chopped cilantro, diced tomatoes, sliced jalapeños
Step-by-Step Instructions: Building Your Cups
The key to success here is making sure each layer is relatively firm before adding the next one, especially the wet layers.
Step 1: Season the Base
In a small bowl, mix the refried beans with the entire packet of taco seasoning until well combined. This is our hearty first layer.
Step 2: Prepare the Creamy Layer
In a separate bowl, combine the sour cream with the fresh lime juice. Stir until smooth. This brightens up the flavor!
Step 3: The Guacamole Layer
If you are making fresh guacamole, mash your avocado and season lightly with salt and pepper. If you are using pre-made guacamole, skip this step.
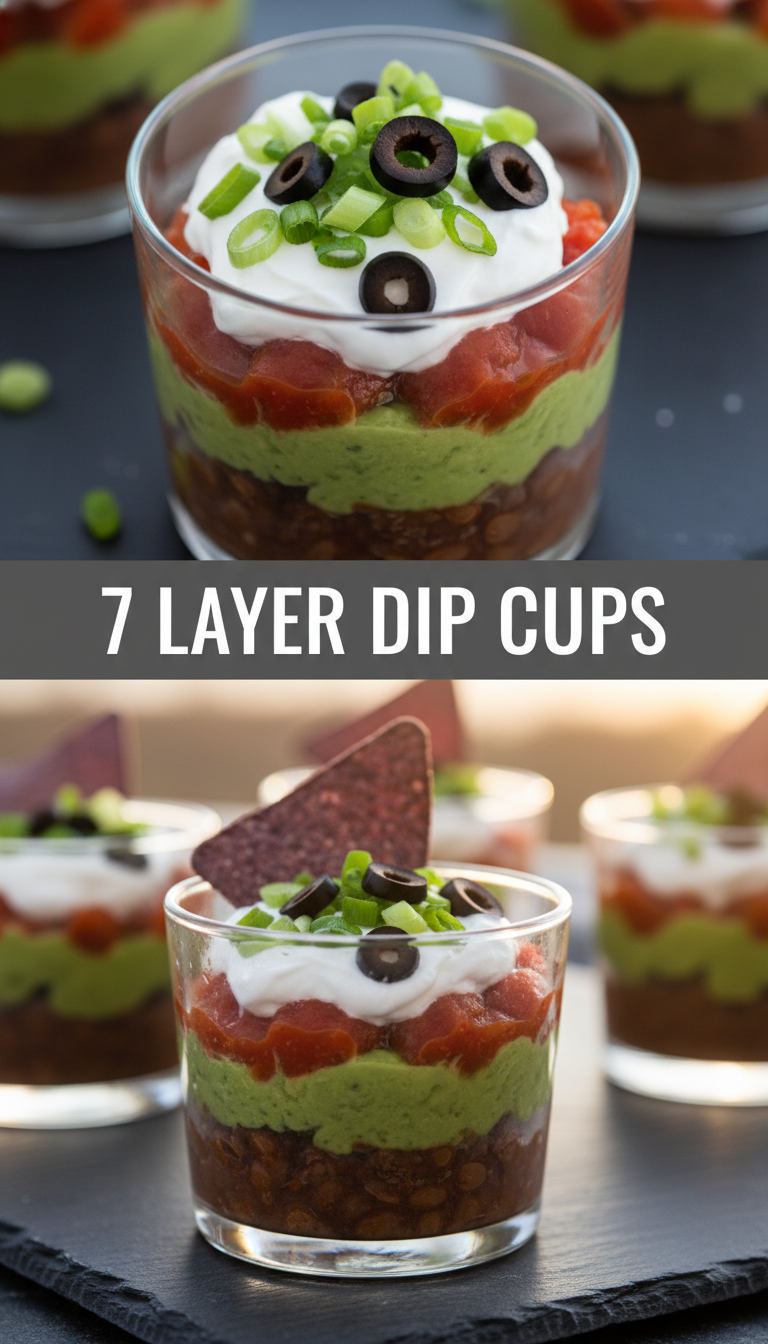
Step 4: Layering Time!
Now for the fun part! We are going to layer these ingredients sequentially into your 8 individual cups. Use about 2-3 tablespoons of each mixture per cup, adjusting slightly based on your cup size.
1. Layer 1 (Bottom): Spoon the seasoned refried beans into the bottom of each cup.
2. Layer 2: Top the beans evenly with a layer of drained salsa. Be gentle so you don’t mix the bean layer!
3. Layer 3: Add the sour cream/lime mixture over the salsa.
4. Layer 4: Carefully spoon the guacamole evenly over the sour cream.
5. Layer 5: Sprinkle a layer of the shredded cheese over the guacamole.
6. Layer 6: Top the cheese with the sliced black olives.
7. Layer 7 (Top): Finish with a sprinkle of optional toppings like fresh cilantro or diced tomatoes.
Step 5: Chill and Serve
Cover the cups loosely with plastic wrap and refrigerate for at least 30 minutes. This allows the flavors to meld and helps the layers set up nicely.
Serving Suggestions
These cups are designed to be self-contained, but they still need a partner!
- Serve immediately upon pulling them from the fridge.
- Provide sturdy tortilla chips, scoops, or Fritos on the side for dipping.
- If serving outside, keep them shaded or on ice to maintain their fresh, cool temperature.
Tips for Customization and Variations
Don’t feel limited by the number seven! This dip is incredibly versatile:
- Spice It Up: Add a layer of pickled jalapeños right before the olives, or mix hot sauce into the sour cream layer.
- Protein Power: Add a layer of seasoned, crumbled ground beef or shredded chicken right above the beans. (If adding meat, make sure it’s warm when you layer it, then chill thoroughly.)
- Use Greek Yogurt: For a lighter version, substitute half the sour cream with plain, thick Greek yogurt.
- Vary the Veggies: Add a thin layer of finely diced green onion or corn kernels in place of the olives.
Estimated Nutritional Information
Please note: This is a rough estimate based on standard ingredient sizes and full-fat dairy. Calorie counts will vary widely depending on serving size and brand choices.
Per serving (1 cup, without chips): Approximately 220 – 250 calories, 10g fat, 7g protein.
Frequently Asked Questions (FAQs)
Q1: Can I make these too far in advance?
A: You can assemble these up to 4 hours ahead of time. If you wait longer than that, the avocado (guacamole) layer might start to oxidize slightly, even when covered. For best results, aim to prep them the morning of your party.
Q2: What if I don’t like olives? Can I skip that layer?
A: Absolutely! Layer dips are highly personal. If olives aren’t your jam, simply skip that layer and use that space to add more cheese or your favorite topping!
Q3: Why do I need to drain the salsa?
A: Salsa is very watery! If you pour undrained salsa directly onto the sour cream or bean layer, it will bleed through, making your carefully constructed layers turn into a soupy mess when you try to scoop. A quick drain in a fine-mesh sieve makes a huge difference!
Happy dipping, friends! Let me know in the comments if you try these cups!