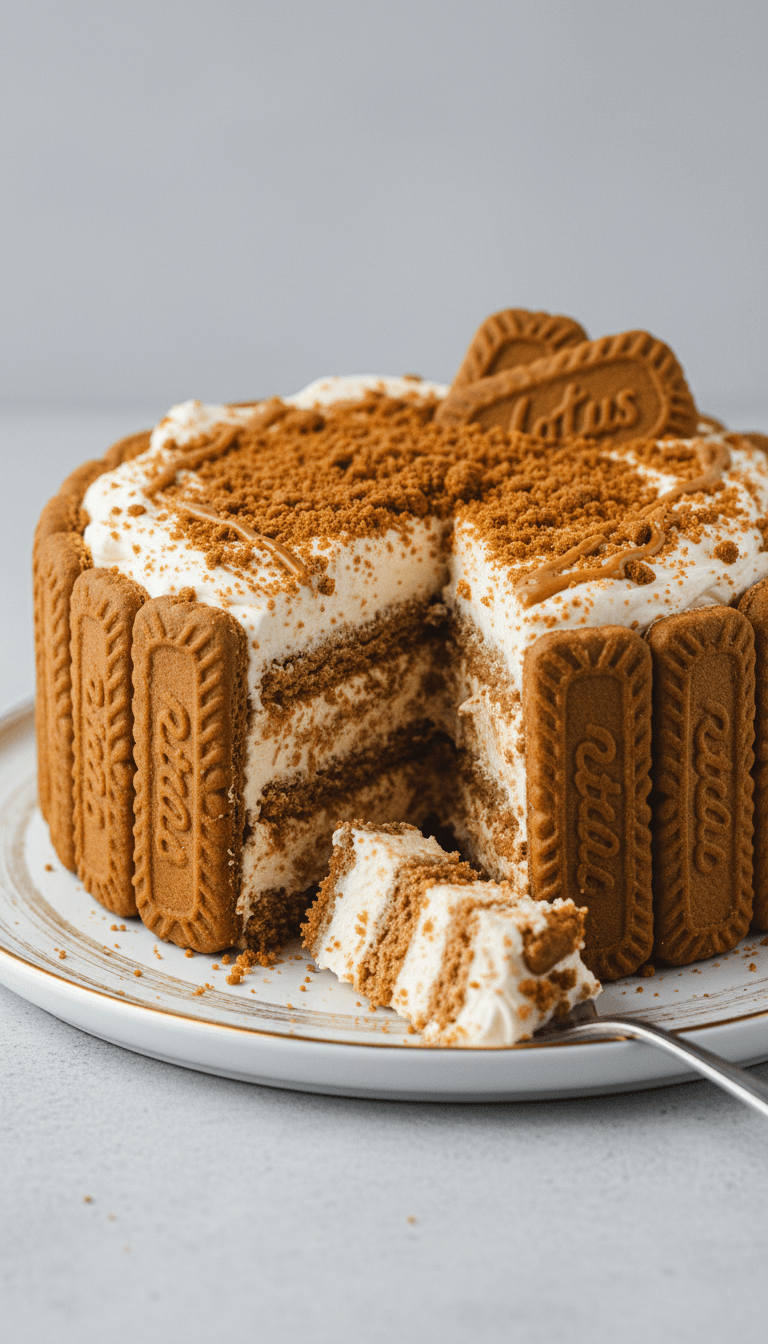
Hey everyone, and welcome back to my kitchen! If you’re anything like me, you sometimes crave something incredibly decadent without wanting to turn on the oven, especially when the weather is warm. Well, have I got the recipe for you today! We are diving headfirst into the caramelized, spiced heaven that is the Biscoff Icebox Cake.
This dessert is so simple, it almost feels like cheating. It layers creamy whipped topping with crunchy, cinnamon-spiced Biscoff cookies, creating a dessert that magically softens into a cake-like texture overnight. Trust me, your family (and your sweet tooth) will thank you!
Quick Facts About This Delight
Here’s the lowdown on how quickly you can get this masterpiece ready:
Prep time: 20 minutes
Cooking time: 0 minutes (It’s no-bake!)
Total time: 20 minutes active time, plus 6 hours chilling time
Serving size: 8-10 slices
Why You’ll Love This Recipe
This Biscoff Icebox Cake is a total winner for so many reasons:
- Absolutely No Baking Required: Seriously, just mixing and layering. Perfect for beginners or busy weeknights.
- Intense Flavor: That signature Biscoff spread and cookie flavor shines through in every bite.
- Perfect Texture: It starts crisp and ends up wonderfully soft and fudgy after chilling.
- Make-Ahead Magic: It tastes better the next day, making it ideal for parties!
Ingredients You’ll Need
This recipe relies on just a few key players. Make sure you have good quality Biscoff cookies—they are the star!
- 1 standard package (about 14-15 oz) of Lotus Biscoff Cookies (Speculoos Cookies)
- 2 cups heavy whipping cream, very cold
- 1/2 cup powdered sugar (confectioners’ sugar)
- 1 teaspoon pure vanilla extract
- 1 cup Biscoff Spread (cookie butter), slightly warmed so it’s pourable
- Optional Garnish: Extra Biscoff cookie crumbs or small whole cookies
Step-by-Step Instructions: Building Your Dream Cake
This is the fun part! We are just layering things up. You’ll need an 8×8 inch square pan or a standard loaf pan for a taller cake.
Step 1: Prep the Creamy Base
In a large, chilled mixing bowl (or the bowl of a stand mixer fitted with a whisk attachment), combine the cold heavy whipping cream, powdered sugar, and vanilla extract. Start on low speed, then gradually increase to medium-high. Beat until stiff peaks form. You want the cream to hold its shape when you lift the whisk—that’s perfect whipped cream!
Step 2: Prepare the Biscoff Sauce
Gently warm your Biscoff spread in the microwave for about 20-30 seconds. You don’t want it hot, just soft enough to drizzle easily. Stir it well until smooth.
Step 3: The Layering Begins
Now, let’s assemble! Choose your serving dish.
1. Spread a very thin layer of whipped cream on the bottom of your pan. This helps the first layer of cookies stick.
2. Quickly dip one side of a Biscoff cookie into the thinned Biscoff spread (or simply brush a thin layer on both sides if you prefer less spread).
3. Arrange a single layer of cookies tightly over the cream base. You might need to break a few to fill the gaps.
4. Top the cookie layer with about one-third of the remaining whipped cream and spread it evenly.
5. Drizzle a good amount of the warmed Biscoff spread over the cream layer.
Step 4: Repeat Until Done
Repeat Step 3 two more times: Cookies, Cream, Biscoff Drizzle. You should end up with a final layer of cream on top.
Step 5: The Chill Factor (The Most Important Step!)
Cover the pan tightly with plastic wrap. Place it in the refrigerator and let it chill for a minimum of 6 hours, but honestly, overnight is best. This time allows the moisture from the cream to soften the cookies, transforming them into a tender, cake-like structure.
Step 6: Serve and Enjoy!
Once chilled, remove the plastic wrap. Garnish with extra cookie crumbs or whole cookies right before serving. Slice and enjoy the magic!
Serving Suggestions
This dessert is rich, so simple presentation works best!
- A light dusting of cocoa powder or ground cinnamon on top adds a nice visual touch.
- Serve alongside a small scoop of vanilla bean ice cream for an extra decadent experience.
- It pairs beautifully with a strong cup of coffee or espresso to cut through the sweetness.
Tips for Customization and Variations
Want to make this recipe your own? Try these easy twists:
1. Spiced Whipped Cream: Add 1/4 teaspoon of ground cinnamon and a tiny pinch of nutmeg to your cream mixture for extra spice depth.
2. Chocolate Swirl: Melt a few ounces of semi-sweet chocolate chips and swirl them into the Biscoff spread before drizzling for a chocolate-caramel combo.
3. Make it Taller: Use a standard loaf pan instead of a square pan. You will need to slightly increase the cream quantity (maybe up to 2.5 cups) to ensure enough height.
4. Different Cookies: If you can’t find Biscoff, graham crackers will work in a pinch, but you will miss that signature caramelized flavor!
Nutritional Information (Estimated)
Please note: This is a rich dessert, and nutritional information is an estimate based on standard ingredients and 10 servings.
Estimated Per Serving: Calories: 450-550 kcal, Fat: 30g, Carbohydrates: 50g, Protein: 4g. Enjoy in moderation!
Frequently Asked Questions (FAQs) About Biscoff Icebox Cake
Q1: Can I make this cake ahead of time?
A: Yes! In fact, it’s recommended. You must chill it for at least 6 hours, but chilling for up to 2 days is perfectly fine. The flavor actually deepens as it sits.
Q2: My Biscoff spread is too hard to drizzle. What do I do?
A: Gently warm it! Place the jar (or the scooped amount) in the microwave for 15-30 seconds. Stir until it’s smooth and pourable, but not hot. If it gets too runny, let it sit for a minute before using.
Q3: What kind of pan should I use?
A: An 8×8 inch square pan works great for a standard, moderately thick layer cake. A loaf pan (9×5 inches) will give you a much taller, richer slice. You can also use an 8-inch round springform pan if you plan on removing the sides easily.
Q4: Can I use Cool Whip instead of real whipped cream?
A: You can, but I strongly advise against it for the best flavor! Real whipped cream provides the necessary lightness and stability. If you must substitute, use a non-dairy whipped topping designed to hold stiff peaks.
Happy baking (or rather, no-baking)! Let me know in the comments if you try this dreamy Biscoff Icebox Cake!