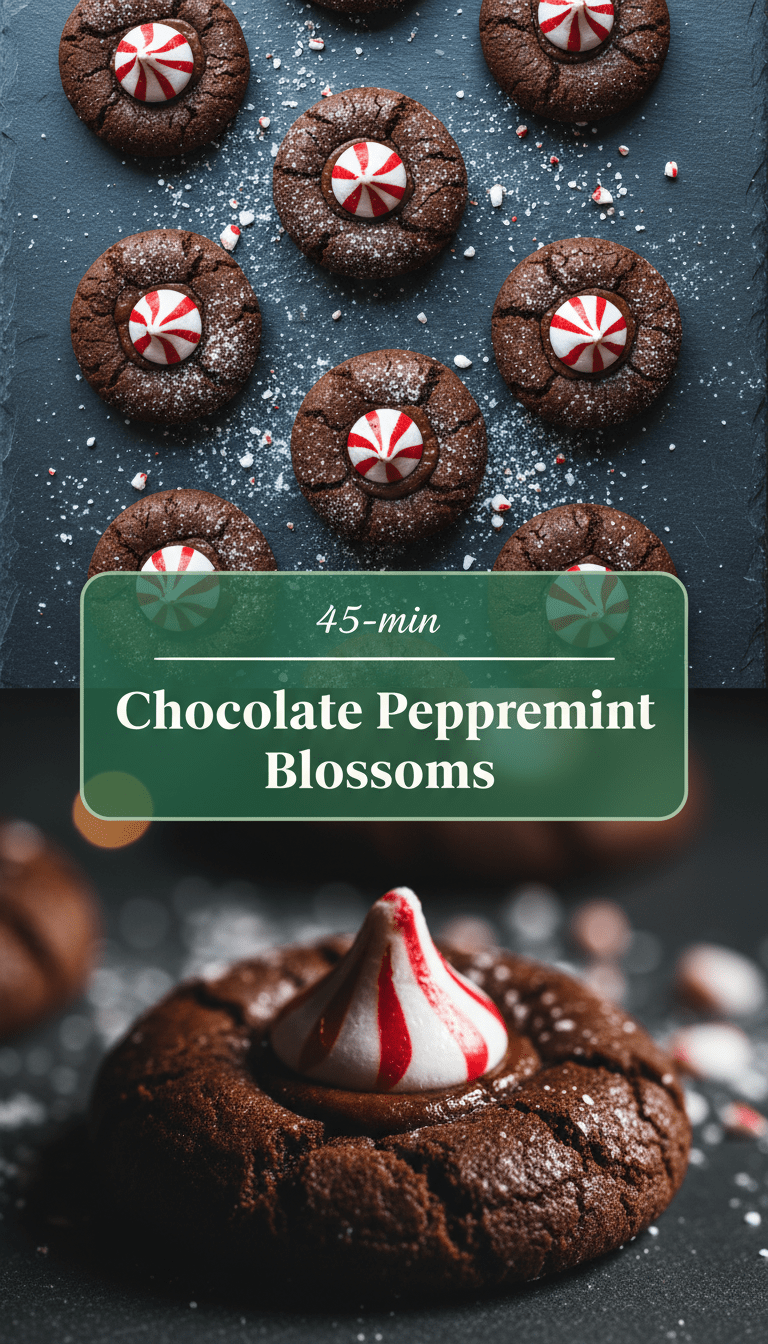
Hello, fellow bakers! It’s that wonderful time of year again when the air smells like pine needles and something wonderfully sweet. Today, I’m sharing a recipe that truly captures the magic of the season: Chocolate Peppermint Blossoms.
These aren’t your grandma’s peanut butter blossoms—oh no! We’re swapping the classic peanut butter base for a rich, deeply chocolatey cookie that melts in your mouth. Then, we top it with a cool, creamy peppermint kiss. They look festive, taste incredible, and are surprisingly simple to make. Let’s get baking!
Quick Facts About These Festive Treats
Here’s what you need to know before you preheat that oven:
Prep time: 20 minutes
Chilling time: 30 minutes (Crucial for easy rolling!)
Baking time: 10-12 minutes
Total time: About 1 hour (plus cooling)
Serving size: Approximately 3 dozen cookies
Why You’ll Love This Recipe
If you’re looking for that perfect blend of rich chocolate and refreshing mint, look no further.
- Flavor Explosion: The dark chocolate cookie paired with the sweet peppermint center is an unbeatable winter combination.
- Picture Perfect: They look stunning on any cookie platter—the deep brown contrasting with the white mint center is pure holiday cheer.
- Easy Technique: If you can roll a ball of dough, you can make these cookies! No fancy piping required.
- Make-Ahead Friendly: You can easily mix the dough ahead of time, making holiday baking less stressful.
What You’ll Need: The Ingredients List
To create these beauties, you’ll need ingredients for the cookie base and the creamy topping.
For the Chocolate Cookie Dough:
- 1 cup (2 sticks) unsalted butter, softened
- ¾ cup granulated sugar
- ¾ cup packed light brown sugar
- 2 large eggs
- 1 teaspoon vanilla extract
- 1 ¾ cups all-purpose flour
- ¾ cup unsweetened cocoa powder (Use a good quality one for better flavor!)
- 1 teaspoon baking soda
- ½ teaspoon salt
- ½ teaspoon espresso powder (Optional, but deepens the chocolate flavor!)
For the Peppermint Topping & Garnish:
- 1 cup confectioners’ sugar (powdered sugar)
- 3 tablespoons unsalted butter, softened
- 2 tablespoons milk or heavy cream
- 1 teaspoon peppermint extract (Start with ½ teaspoon and taste; it’s potent!)
- Pinch of salt
- Crushed candy canes or peppermint candies for rolling/sprinkling
Step-by-Step Instructions: Baking Bliss
Follow these simple steps, and you’ll have gorgeous cookies in no time!
Step 1: Creaming the Base
1. In a large bowl, use an electric mixer to beat the softened butter, granulated sugar, and brown sugar until light and fluffy—this takes about 3 minutes.
2. Beat in the eggs one at a time, ensuring each is fully incorporated before adding the next. Stir in the vanilla extract.
Step 2: Mixing the Dry Ingredients
1. In a separate medium bowl, whisk together the flour, cocoa powder, baking soda, salt, and espresso powder (if using).
2. Gradually add the dry ingredients to the wet ingredients, mixing on low speed until just combined. Do not overmix!
Step 3: Chilling is Key!
1. Wrap the chocolate dough in plastic wrap and flatten it slightly into a disk. Chill in the refrigerator for at least 30 minutes. Chilling prevents the cookies from spreading too much in the oven.
Step 4: Baking the Chocolate Cookies
1. Preheat your oven to 375°F (190°C). Line baking sheets with parchment paper.
2. Roll the chilled dough into small, 1-inch balls.
3. Roll each ball in crushed candy canes (or simply roll them plain if you prefer to top them later).
4. Place the balls about 2 inches apart on the prepared baking sheets.
5. Bake for 10 to 12 minutes. They will look slightly soft in the center but will set as they cool. Let them cool on the baking sheet for 5 minutes before moving them to a wire rack to cool completely.
Step 5: Whipping Up the Peppermint Kiss
1. While the cookies cool, prepare the filling. In a small bowl, beat the confectioners’ sugar, softened butter, milk/cream, peppermint extract, and salt until smooth and creamy. If it seems too thick, add milk, one teaspoon at a time. If it’s too thin, add a tablespoon more powdered sugar.
Step 6: The Grand Finale!
1. Once the chocolate cookies are completely cool, use a small offset spatula or a butter knife to spread a generous dollop of the peppermint frosting onto the top of each cookie.
2. Garnish immediately with a sprinkle of extra crushed candy canes before the frosting sets. Enjoy!
Serving Suggestions
These cookies are fantastic all on their own, but here are a few ways to elevate the experience:
- Hot Cocoa Companion: Dip the chocolate edge into a mug of rich, steaming hot chocolate.
- Dessert Platter Star: They look stunning alongside bright red velvet cookies or simple sugar cookies.
- Milk’s Best Friend: Nothing beats a fresh-baked cookie and a tall glass of cold milk (dairy or non-dairy!).
Tips for Customization and Variations
Want to make these cookies uniquely yours? Try these easy tweaks:
- Dark Chocolate Lovers: Substitute half of the all-purpose flour with cake flour for an even more tender crumb. You can also use dark cocoa powder for a deeper color and flavor.
- Mint Chip Style: If you prefer a firmer topping, skip the frosting! Instead, press a plain chocolate kiss candy directly into the center of the warm cookie immediately after removing it from the oven.
- No Peppermint? No Problem: If mint isn’t your favorite, swap the peppermint extract for almond or orange extract for a delightful citrus-chocolate pairing.
- Make it Vegan: Use plant-based butter sticks and swap the eggs for flax eggs (1 tablespoon ground flaxseed mixed with 3 tablespoons water per egg).
Nutritional Information (Estimated)
Please remember this is a rough estimate and will vary based on specific brands and portion sizes.
Per cookie (estimate): Approximately 160-180 calories, 8g fat, 22g carbohydrates, 1g protein. These are a treat, so enjoy them in moderation!
Frequently Asked Questions (FAQs)
Q: Can I make the dough ahead of time?
A: Absolutely! The dough can be made up to 3 days in advance. Keep it wrapped tightly in the refrigerator. Be sure to let it sit out on the counter for about 15 minutes before rolling so it’s easier to scoop.
Q: My cookies spread too much. What did I do wrong?
A: The most common culprit is not chilling the dough enough, or using butter that was too soft. Make sure your butter is just softened, not melted, and definitely chill the dough for the full 30 minutes before scooping!
Q: How should I store leftover Chocolate Peppermint Blossoms?
A: Store them in an airtight container at room temperature for up to 5 days. If you have a lot, you can freeze the un-frosted cookies for up to 3 months. Frost them once they are thawed and cooled.
Happy baking, everyone! I hope these Chocolate Peppermint Blossoms bring a little extra sparkle to your holiday season! Don’t forget to tag me if you try them!