Hey food lovers! If you think carrots are just for dipping or maybe a humble side in a stew, get ready to have your mind blown. Today, we are transforming those humble orange roots into something truly spectacular: Crispy Smashed Carrots. Trust me, these aren’t your grandma’s boiled carrots. They are tender on the inside, shatteringly crisp on the outside, and coated in the most addictive savory glaze. This recipe is so easy, it’s almost criminal, and it guarantees everyone at the table will be asking for seconds. Let’s get smashing!
Quick Facts
Prep time: 10 minutes
Cooking time: 30-35 minutes
Total time: 40-45 minutes
Serving size: 4 side servings
Why You’ll Love This Recipe
This dish is a weeknight hero! Here’s why it needs to be in your rotation:
- Texture Heaven: The combination of soft, sweet carrots and those wonderfully browned, crispy edges is irresistible.
- Minimal Effort, Maximum Flavor: Seriously, boiling, smashing, and baking—that’s it! The flavor payoff is huge for the tiny amount of work involved.
- Naturally Delicious: Carrots get incredibly sweet when roasted, making this a great way to sneak extra veggies onto picky eaters’ plates.
- Versatile: It pairs perfectly with almost any main course, from roasted chicken to vegetarian burgers.
Ingredients You’ll Need
Gather up these simple items. You probably have most of them already!
- 1.5 lbs medium carrots (about 1 bunch), scrubbed clean (no need to peel if they are fresh!)
- 2 tablespoons olive oil
- 1 teaspoon kosher salt (plus more for finishing)
- 1/2 teaspoon black pepper
- 1/2 teaspoon garlic powder
- 2 tablespoons butter (for basting)
- 1 tablespoon maple syrup (or honey)
- 1 teaspoon smoked paprika (for color and depth)
- Optional garnish: Fresh chopped parsley or dill
Step-by-Step Smashed Carrot Magic
Follow these easy steps, and you’ll be enjoying perfect crispy carrots in no time!
Step 1: The Gentle Boil
First, we need to soften the carrots slightly so they can be smashed effectively. Place your scrubbed carrots in a large pot. Cover them with cold water and add a pinch of salt. Bring the water to a boil, then reduce the heat slightly and let them simmer gently for about 8 to 12 minutes. You want them tender enough to pierce easily with a fork, but not mushy. They should still have some structural integrity. Drain them well and let them cool down just enough so you can handle them.
Step 2: Preheat and Prep the Pan
While the carrots are cooling, preheat your oven to a hot 425°F (220°C). Line a sturdy baking sheet with parchment paper for easy cleanup (a must!).
Step 3: The Art of the Smash
This is the fun part! Place the slightly cooled, cooked carrots on the prepared baking sheet. Using the bottom of a heavy glass or mug, gently press down on the center of each carrot until it flattens out significantly—aiming for about a 1/2-inch thickness. Don’t crush them into oblivion; we want rustic, slightly uneven shapes!
Step 4: Seasoning for Success
In a small bowl, whisk together the olive oil, garlic powder, smoked paprika, salt, and pepper. Drizzle this mixture evenly over the smashed carrots. Use your fingers or a pastry brush to make sure every surface gets a good coating.
Step 5: The Initial Crisp
Place the baking sheet in the preheated oven and roast for 15 minutes. This initial roast dries them out a bit and starts building that crispy edge.
Step 6: The Sticky Glaze Finish
While the carrots roast, prepare your simple glaze. In the same small bowl you used before (no need to wash it!), melt the butter and stir in the maple syrup until combined.
After the initial 15 minutes, carefully remove the sheet pan. Brush the tops of the carrots generously with the maple-butter glaze. Return them to the oven for another 10 to 15 minutes, or until the edges are deeply caramelized, dark golden brown, and wonderfully crisp. Watch them closely during this last stage so the maple syrup doesn’t burn!
Step 7: Serve Immediately
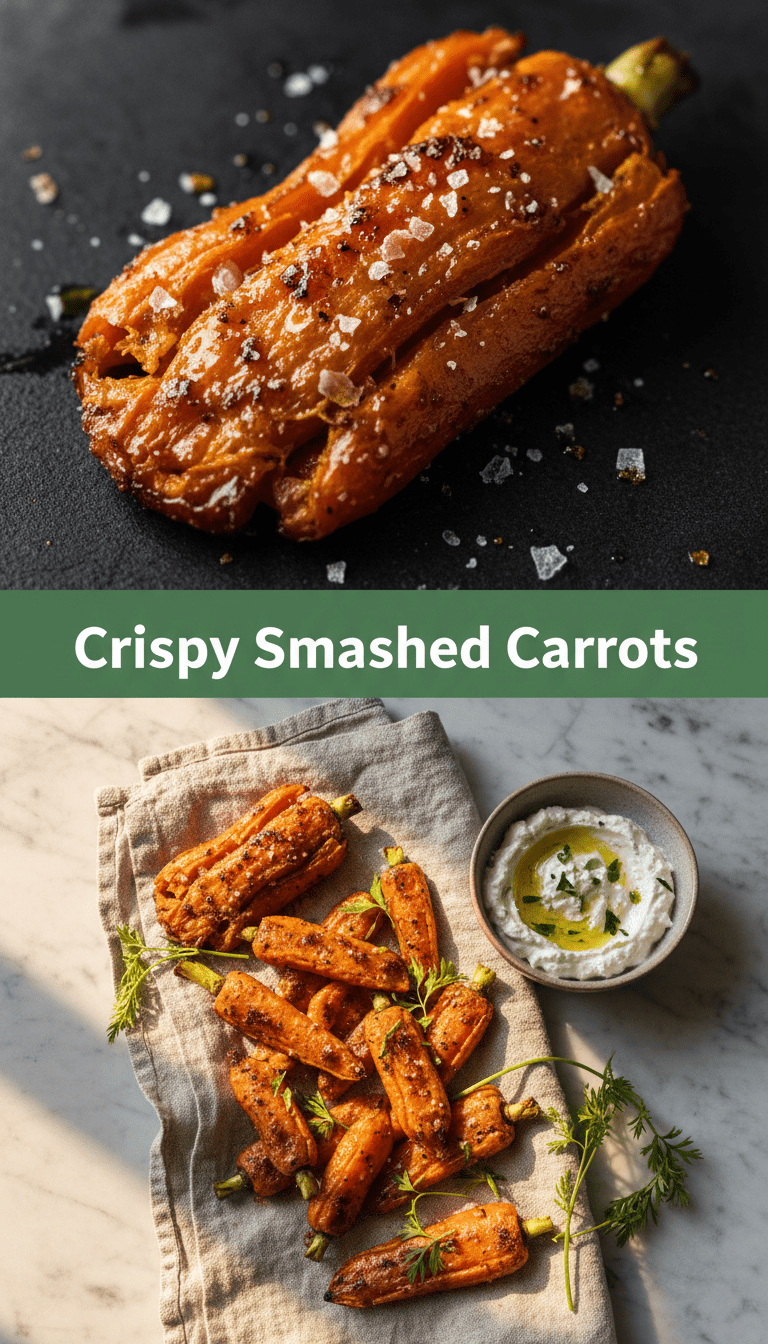
Pull them out, sprinkle with flaky sea salt (if you have it!) and fresh herbs, and serve hot. Enjoy the crunch!
Serving Suggestions
These Crispy Smashed Carrots are show-stoppers on their own, but they shine next to:
- Roast Chicken or Turkey: The sweetness cuts through rich meat beautifully.
- Pork Chops: Especially good with a mustard-based sauce.
- Vegetarian Mains: Fantastic alongside lentil loaf or a hearty grain bowl.
Tips for Customization and Variations
Want to jazz things up even more? Try these swaps:
- Spice It Up: Add a pinch of cayenne pepper or red pepper flakes to your oil mixture for a little heat.
- Herb Power: Swap parsley for fresh rosemary or thyme leaves added during the final 10 minutes of baking.
- Tangy Twist: Drizzle with a teaspoon of balsamic vinegar right before serving for a sweet-and-sour kick.
- Nutty Crunch: Toss 1/4 cup of chopped pecans or walnuts onto the pan during the last 5 minutes of baking for added texture.
Nutritional Information (Estimated Per Serving)
Please note: These are rough estimates and will vary based on exact ingredient amounts.
Calories: Approximately 150-180
Fat: 9g
Carbohydrates: 18g
Fiber: 4g
Sugar: 8g (mostly natural carrot sugar and maple syrup)
Frequently Asked Questions (FAQs)
Q1: Do I really have to boil the carrots first?
Yes, boiling is key! If you try to smash raw carrots, they will simply break or shatter unevenly. The pre-boil ensures they are pliable enough to flatten nicely while still holding their structure for that final crisping process.
Q2: Can I skip the maple syrup?
Absolutely, though I highly recommend it for the glaze! If you omit it, ensure you still use the butter to help the seasonings adhere and crisp up. For a savory-only version, skip the syrup and use extra olive oil and herbs.
Q3: What kind of carrots work best?
Medium-sized, uniform carrots are ideal. Avoid very skinny carrots (they will overcook fast) or massive carrots (they will take too long to boil evenly). Fresh, scrubbed baby carrots can also work in a pinch, but boil them for only 5-7 minutes.
Q4: How do I store leftovers?
These are definitely best eaten fresh! If you have leftovers, store them in an airtight container in the fridge for up to 3 days. Reheat them in a toaster oven or a hot oven (400°F) for about 5-7 minutes to bring back some of that coveted crispiness. Microwaving them will make them soft again.